I love to use this on chicken. I’ll marinade chicken in this and then when I go to cook the chicken, take the leftover marinade and cook it down with some grape tomatoes and top with mozzarella cheese and put that on top of the cooked chicken for a delicious caprese-style chicken. This makes a lot — feel free to add some oil and use the leftover marinade for a delicious balsamic dressing for salads! As with all of my marinades, these are ratios that can be adjusted or saved for later. Ideally, marinate anywhere from 30min to overnight.
1 cup balsamic vinegar 1/4 cup lemon juice 1/2 tsp dried basil 1/2 tsp salt 1/2 tsp black pepper 1/2 tsp onion powder 1 tsp dried parsley
To make this into a dressing: Add olive oil and sugar to taste. I find adding 1/4tsp of sugar and a 1/4 cup of olive oil to the above works. If you are using leftover marinade to make a dressing, use less oil and sugar.
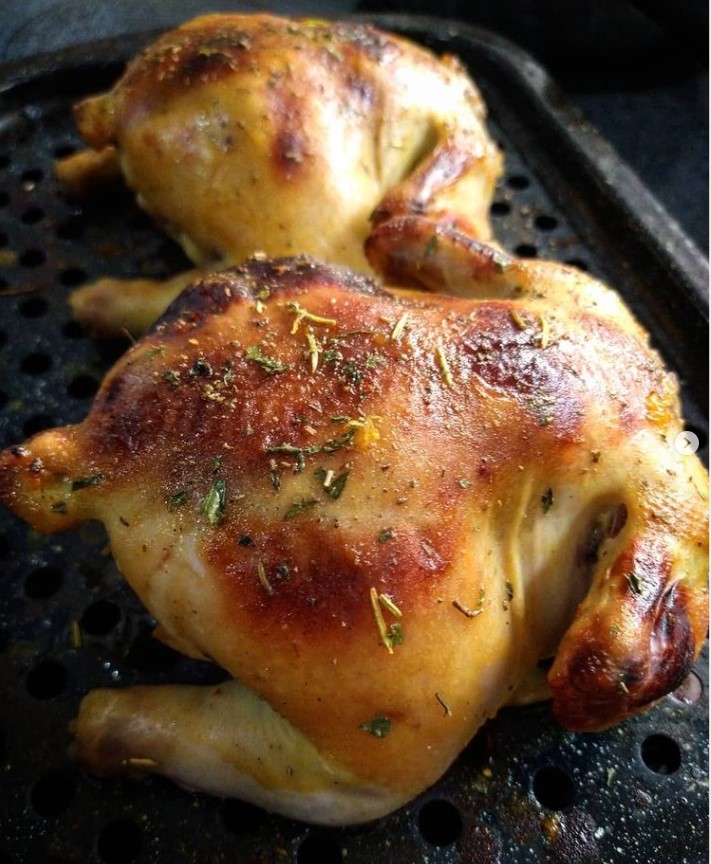
This marinade goes great with bird meats: chicken, game hens, turkey…. We use it on various chicken cuts throughout the year and it helps the meat retain moisture while cooking. As with all of my marinades, these are ratios that can be adjusted or saved for later. Marinade anywhere from a half hour to overnight, for best effect.
2 Cups orange juice 1/2 cup lemon juice 1/2 cup lime juice 3 tbsp honey 1 tbsp paprika 1 tbsp soy sauce (for color) 2 tbsp yellow mustard 1 tbsp brown (or spicy) mustard
Gluten-free? Find a gluten-free tamari soy sauce. Soy-free? Coconut aminos can substitute.
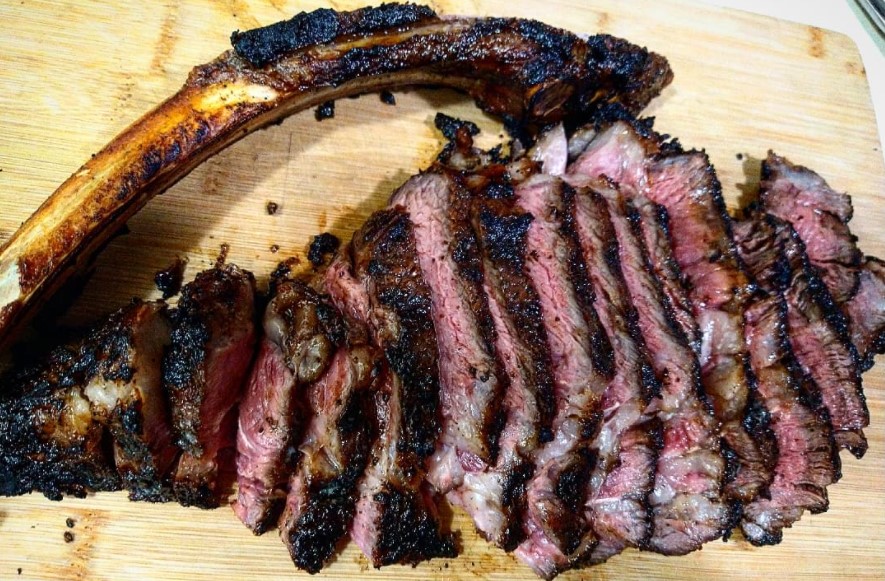
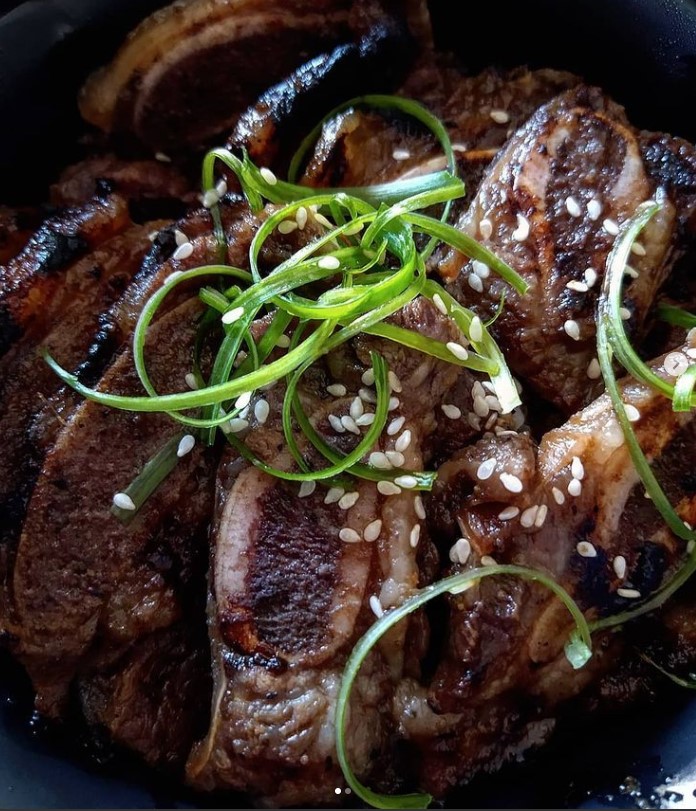
Use this on chicken, pork, shrimp, or beef. Marinate 2hrs to overnight. Leftover marinade can be reduced into a glazy and delicious sauce. As with all of my marinades, these are ratios that can be adjusted or saved for later.
1 Cup brown sugar ¾ cup soy sauce ¾ cup mirin/rice vinegar 2 tbsp sesame oil 1 tbsp gochujang (more if you want spicier) 1 tbsp miso paste 2 tsp ground ginger ½ tsp MSG (optional) Thinly sliced green onions (optional)
Gluten-free? Find a gluten-free tamari soy sauce. Soy-free? Coconut aminos can substitute.
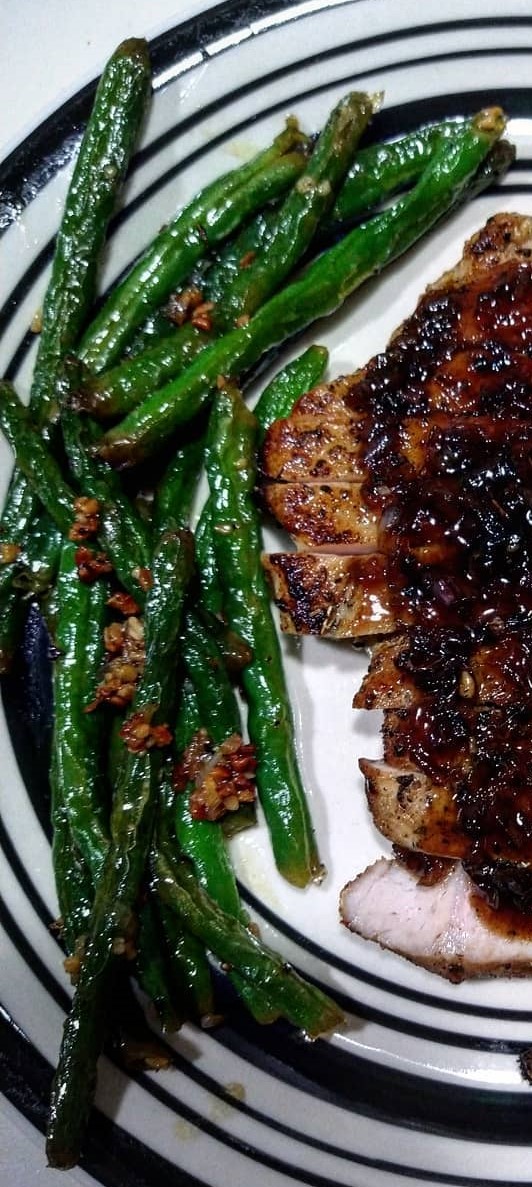
Don’t ask me when, but somewhere down the line during my first real foray into the ketogenic and low-carb lifestyles I discovered just how DELICIOUS green beans can truly be. Most of the time growing up, they came from cans or sometimes frozen bags of these tiny cut things that didn’t have a lot of flavor, until that once-per-year BBQ when some relative would make them that involved seasoning. Now that I’m an adult, I’ve come to realize that garlic and seasonings are basically the secret to good food.
I’ll also let you know that it took a few tries to get this right. Now, I’m also a fan of doing a quick boil on fresh green beans, but this is a recipe you can also use with canned or frozen, pretty much regardless of cut. I love to make these with fresh green beans, mostly because I can snap them and have that happy memory of being out on the patio in the summer snapping fresh beans.
Down below, I mostly go over one, but they apply mostly to all types: canned, frozen, and fresh. Not particularly because the methodology of cooking is different, but how the greens are presented will be. Canned vegetables are often stored in water, which helps keep them in good condition inside the can for longer, but that means now there’s water in the vegetable that would get cooked out. Frozen vegetables go through a process of “flash-freezing”, which is taking the fresh vegetable as it’s produced and rapidly freezing it to preserve nutrients, flavor, and ripeness. This means it doesn’t have as much water inside of it, unless your freezer is like mine and doesn’t always keep consistent temperatures and now you have freezer burn inside the bags of vegetables. And fresh is, you know, well, fresh.
Ingredients: Green beans (fresh, frozen, canned, various cuts) Garlic (minced or fresh) Butter Low-heat oil Salt Pepper Water Frying pan, 1″ deep minimum 1/4 tsp sugar (optional)
Prep your beans and your pan:
If canned: Drain about 3/4 – 4/5 of the water in the can. No need for specifics, just open the can most of the way, keep the lid on, and pour a good amount of liquid down the drain without getting rid of all of it. Water will be used to help speed up the cooking process, since steam will be hotter than any water, regardless if boiling, already in the pan. Stir occasionally until hot and water is boiled away.
If frozen: Don’t need to defrost and drain, just use the ice already in the bag. Put the pan on moderately high and cover with a lid to melt the ice. Stir occasionally until beans darken and almost no water is left in the pan.
If fresh: The end of the green bean that has a solid stem is the side you want to snap. If you’ve never snapped green beans before, then take one side between an index and thumb and the other end with the stem in your other hand. Bend the end with the stem until it “pops” on its own. This might take a few tries before you discover where a “sweet spot” is. Heat up a pan on moderately high to high and add enough water to give about 1/2″ of water coating at the bottom of the pan. The idea is to cover this up and let the steam do a lot of the work until they darken and the water is just about boiled off.
Once the steam has been doing its job and the beans are hot and cooked, add in about a tablespoon of low-heat oil, like olive, and some slivers of butter. The idea is to add some fat, which will bring out flavor. Add in minced garlic, salt, and pepper as the butter melts. If you boil the butter quickly in the pan so that it froths, it will brown and have a richer flavor. However, as soon as it begins to have a browned appearance and a lighter colored foam, take it off the heat before the butter actually begins to burn.
Cook’s Note: As the butter is melted and the garlic becomes aromatic, add about a quarter teaspoon of sugar to enhance the dish. Not mandatory, but it will add to the buttery goodness.
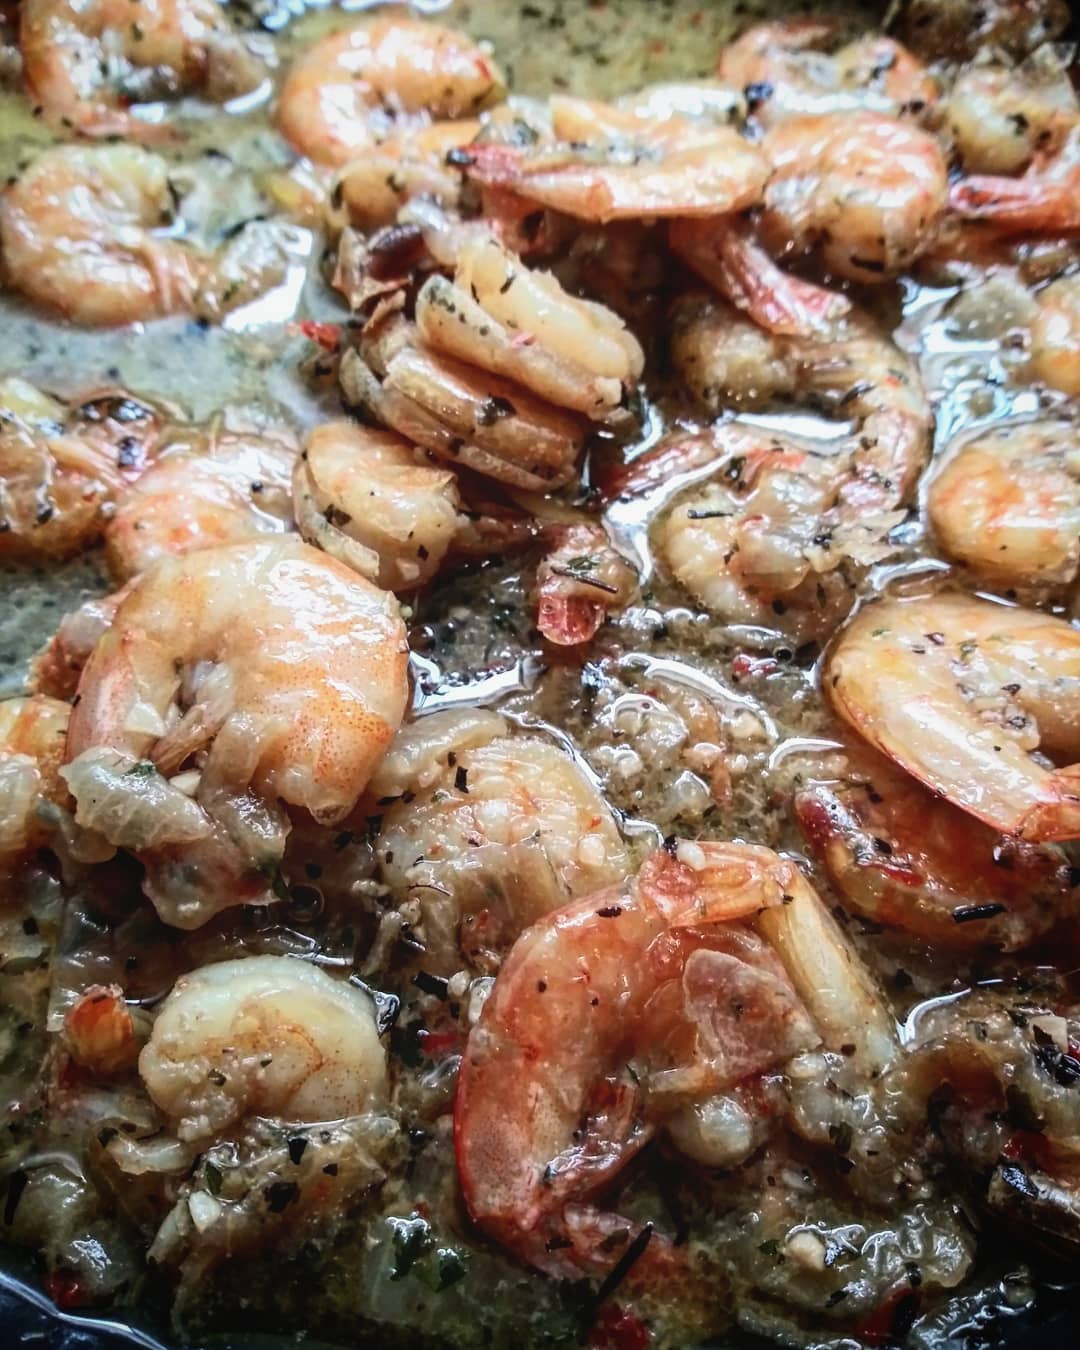
Shrimp? Good. Pasta? Good. White wine garlic sauce? GOOOD.
If you’ve been following this blog or really any of my cooking, I think you’re discovering my secret to things that smell and taste good: lots of seasoning, salt, fat, and caramelized onions and garlic. On that note, one of my favorite food docu-series is called “Salt Fat Acid Heat” and honest-to-goodness that is seriously one of the best series to watch if you want to explore more into cooking well. And because everybody’s gotta eat, might as well, right? Here you’ve got regular salt as well as from the shrimp, fat in the butter, acid from the wine, and heat from the physical application of heat plus crushed red pepper. Makes a pretty tasty dish. Acid can also come from lemon juice if you want to lighten up the flavor palette here as well.
Another thing to note that in the photo, I did not de-shell the shrimp. As a matter of fact, I was particularly lazy and used a bag of frozen uncooked shrimp for this and simply added it to the pan. Now, we did de-shell once we ate, but cooked shrimp shells are easily digestible by MOST stomachs. Not to say all, because some people are sensitive to these kinds of things. Think of it like… shrimp croutons. Maybe not.
Ingredients:
Shrimp (peeled and de-veined, preferably)
Butter
Onion
Garlic
White wine (or white cooking wine)
Salt
Pepper
Thyme
Parsley
Basil
Crushed red pepper
Lemon juice (optional)
Cornstarch (optional)
Dice about half an onion into 1/4″ pieces, and put into a pan over low heat with low-heat oil and plenty of salt. Cook it low and slow til brown, occasionally adding butter or more oil to keep the pan wet. If you need more direction on this, come check out the Caramelizing Onions post. If you have fresh cloves of garlic, add it at the start of your caramelizing process, otherwise if you are using minced in the jar, add it towards the end. Garlic is something you measure with your heart, not with a spoon.
Once everything is softened, browned, and sweet, crank up the heat as high as you can go without setting off any smoke alarms. Add in the white wine to deglaze [read: unstick everything from the pan and make a sauce] the pan. Let the wine boil and reduce until it becomes thicker, and add the herbs and spices and lower the heat. Salt helps to open up the pores on your tongue to taste all of the goodness of this sauce, so remember to use enough of it. There’s a bell-curve of salt vs tastiness, so you can keep adding some and tasting until it gets good. If you wish, add lemon juice/cornstarch/butter as you see fit to alter this recipe so that it suits your tastes better. Add in the shrimp and cook until they become curved into a “C” shape and become pink.
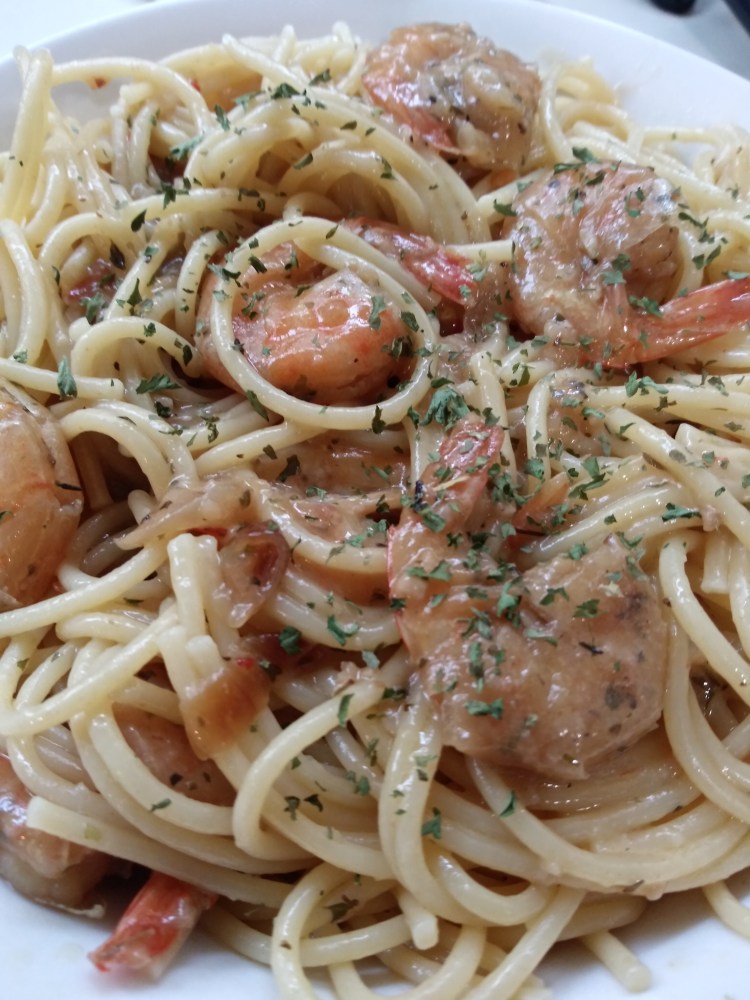
Serve over pasta and top with some parsley if you want to make it look nice. Also, parsley can help counteract garlic breath, so, plus.
My partner still eats wheat while I don’t, so I made my dinner with spaghetti squash. However, that doesn’t photograph nearly as well.
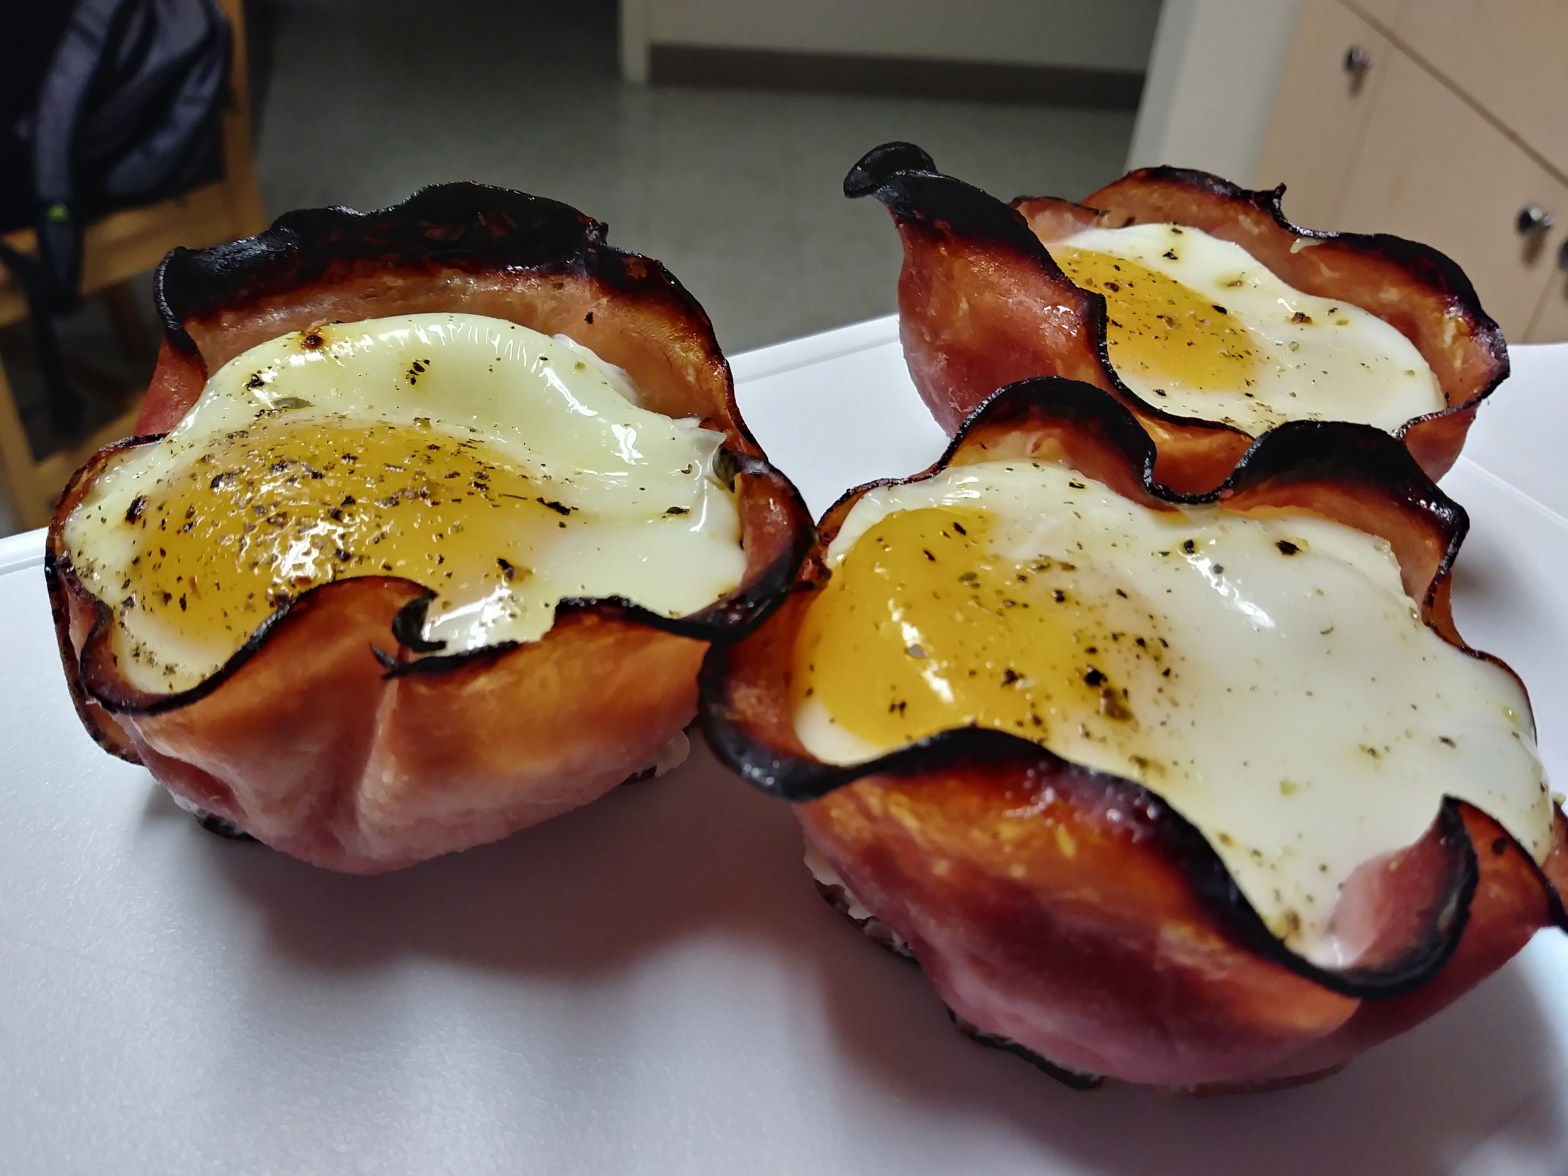
Muffin tin? Check. Eggs? Check. Ham? Check. Shredded cheese? Also check. These are very easy to make, and can make your morning routine (or whenever you want a portable meal) easier and faster if you make these in advance. I have typically filled up the whole muffin tin, and would reheat two of these for breakfast throughout the week. I make these sunnyside-up style, but if you cook them for longer, they’ll have less runny egg yolks. Also keep in mind that the microwave will also cook egg yolks further.
I don’t recall exactly when I got inspired for these, but they came about from not having consistent luck when it came to making breakfast style egg cups and always getting some stuck in the tin. I’ve seen these reposted across several sites and magazines over the years since I first made these, since at the time I was living in a college dormitory and needed quick fixes on my walk across campus to my car before work.
Ingredients:
Eggs Ham (I use “black forest” or “honey ham”, pre-sliced from the deli) Shredded cheese of choice Salt Pepper Muffin tin
Layer 2-3 slices of ham per cup, careful to cover all sides of each cup. The ham has some liquid in it, which will prevent the eggs from sticking. If you prefer less runny yolks or dislike the sight of sunnyside-up style eggs, take a moment to whisk the egg, cheese, and salt and pepper in a bowl before pouring some into each cup.
I personally prefer to use shredded pepper jack cheese, but other cheeses such as a mild cheddar or mozzarella will work just fine. After the ham, stack in a layer of cheese, crack an egg on top, and sprinkle with salt and pepper. Bake at 325 for about 10 minutes for runny eggs, 12 for slightly, 15 for fully cooked yolks. If you scramble them, a 12 minute cook time will also work.
Are you one of those people that think that when a recipe says 2 or 3 cloves of garlic, you contemplate 20 or 30? I think you’ll like this. This involves sauteing fresh garlic cloves until they’re browned, softened, and sweet. Yes, cooking these down makes them soft and sweet, so eating whole cloves of garlic don’t feel as pungent and you don’t feel quite so bad for smelling like garlic for a day or two. Quite.
If you look elsewhere on the internet, you might find this labelled “20 clove” or “40 clove” like that restaurant in L.A., but I honestly believe garlic is not something you measure nor you count. Just start breaking apart bulbs of it and when you’ve had enough of peeling fresh cloves, you might be at a good amount. For this, I used almost three full bulbs, but because it was so fresh and not fully dried, we had a hard time peeling everything and left a couple of cloves for later use. It was probably in excess of 20 cloves altogether, but I didn’t actually count.
This stems from an old French recipe, and when I say this, expect to use a fair amount of both wine and butter. Now, if you don’t want to use wine or regular cooking wine you’ll find in the vinegar section of the supermarket, it’s okay. It’s not mandatory to use, but it just adds flavor. The key part of using wine, or cooking wine which is with added salt and reduced alcohol content so it’s available for general use, is to add it to a searing hot pan and let it “deglaze” the pan. This is a fancy word for wetting the super hot pan and getting things to stop sticking to it. The idea is to let most of the liquid and alcohol boil off, leaving just the flavor of the wine, which makes this perfectly safe to have for anyone who is avoiding alcohol. People have done the math elsewhere on the internet, but the idea is to boil it for several minutes to burn off the alcohol content.
Ingredients:
Fresh Garlic Butter White wine (or white cooking wine), 12oz minimum Onion, diced, half Thyme Salt Pepper Crushed red pepper Low-Heat Oil (like olive) Chicken (cut of choice, I used boneless chicken thighs) Parmesan cheese Parsley Cornstarch (optional)
Concept: Saute onions and garlic cloves, then remove and heat pan as hot as comfortable, then sear the chicken quickly, without worrying about fully cooking. Use wine deglaze pan and reduce. Turn heat off, and add back in onions, garlic, and spices. Put chicken back into pan, sprinkle with parmesan cheese, and bake at 350 until chicken is cooked through.
Dice the half an onion into 1/4″ pieces, or finer if you wish, and put into a pan on low heat with a low-heat oil, like olive oil. Peel as much garlic as you can, but it might prove easier to use the flat side (broad side) of a knife to help put pressure onto a clove to break it just enough to peel it. Use plenty of salt to help draw out moisture and the natural sugars of the onion and garlic in the pan, and let it cook, tossing in the pan on occasion. Keep the pan wet with oil and add butter as things begin to brown. Feel free to reference Caramelizing Onions for more tips on getting this done.
Take the onions and garlic out of the pan once they’re sweet and buttery, and put them into a dish off to the side. We just want to get them out of the way so they don’t burn in this next step. Crank the heat up on the pan as high as your stove allows (or as high as you allow your stove to go if you, like me in the past, have had a smoke alarm almost directly above your cooking area) and allow it to start to smoke. Add some extra oil and butter in the pan to help prevent sticking, and sear the chicken on both sides. It’s okay to not fully cook the chicken in this step, we’re just getting the process started and we will finish this in the oven. Once all the chicken has been seared and the pan is quite possibly sticky, remove the chicken from the pan and add the wine. The wine will deglaze the pan, or in layman’s terms, remove some of the stickiness and anything stuck to it. Let the wine boil down and reduce, then turn off the heat and add back in the onions and garlic. Add pepper, a little bit more salt, crushed red pepper, and thyme to the mix, letting the spices cook into the sauce. If you find that the sauce feels too thick, add more butter. If the sauce feels too thin, make a roux with cornstarch. During this process of making the sauce, take a moment to preheat your oven to 350.
Once the sauce feels and tastes secure, add the chicken back in and stir it into the sauce. Feel free to coat it, so that the chicken is fully submerged in juices that’ll keep it delicious and flavorful during the time in the oven. Top the chicken with some parmesan cheese, I personally use shredded over grated for this, and put into the oven for about 10-15 minutes, depending on what cut of chicken you are using. Thighs don’t take as long to cook as breasts due to typically thinner cuts of meat, particularly if you use boneless and skinless thighs.
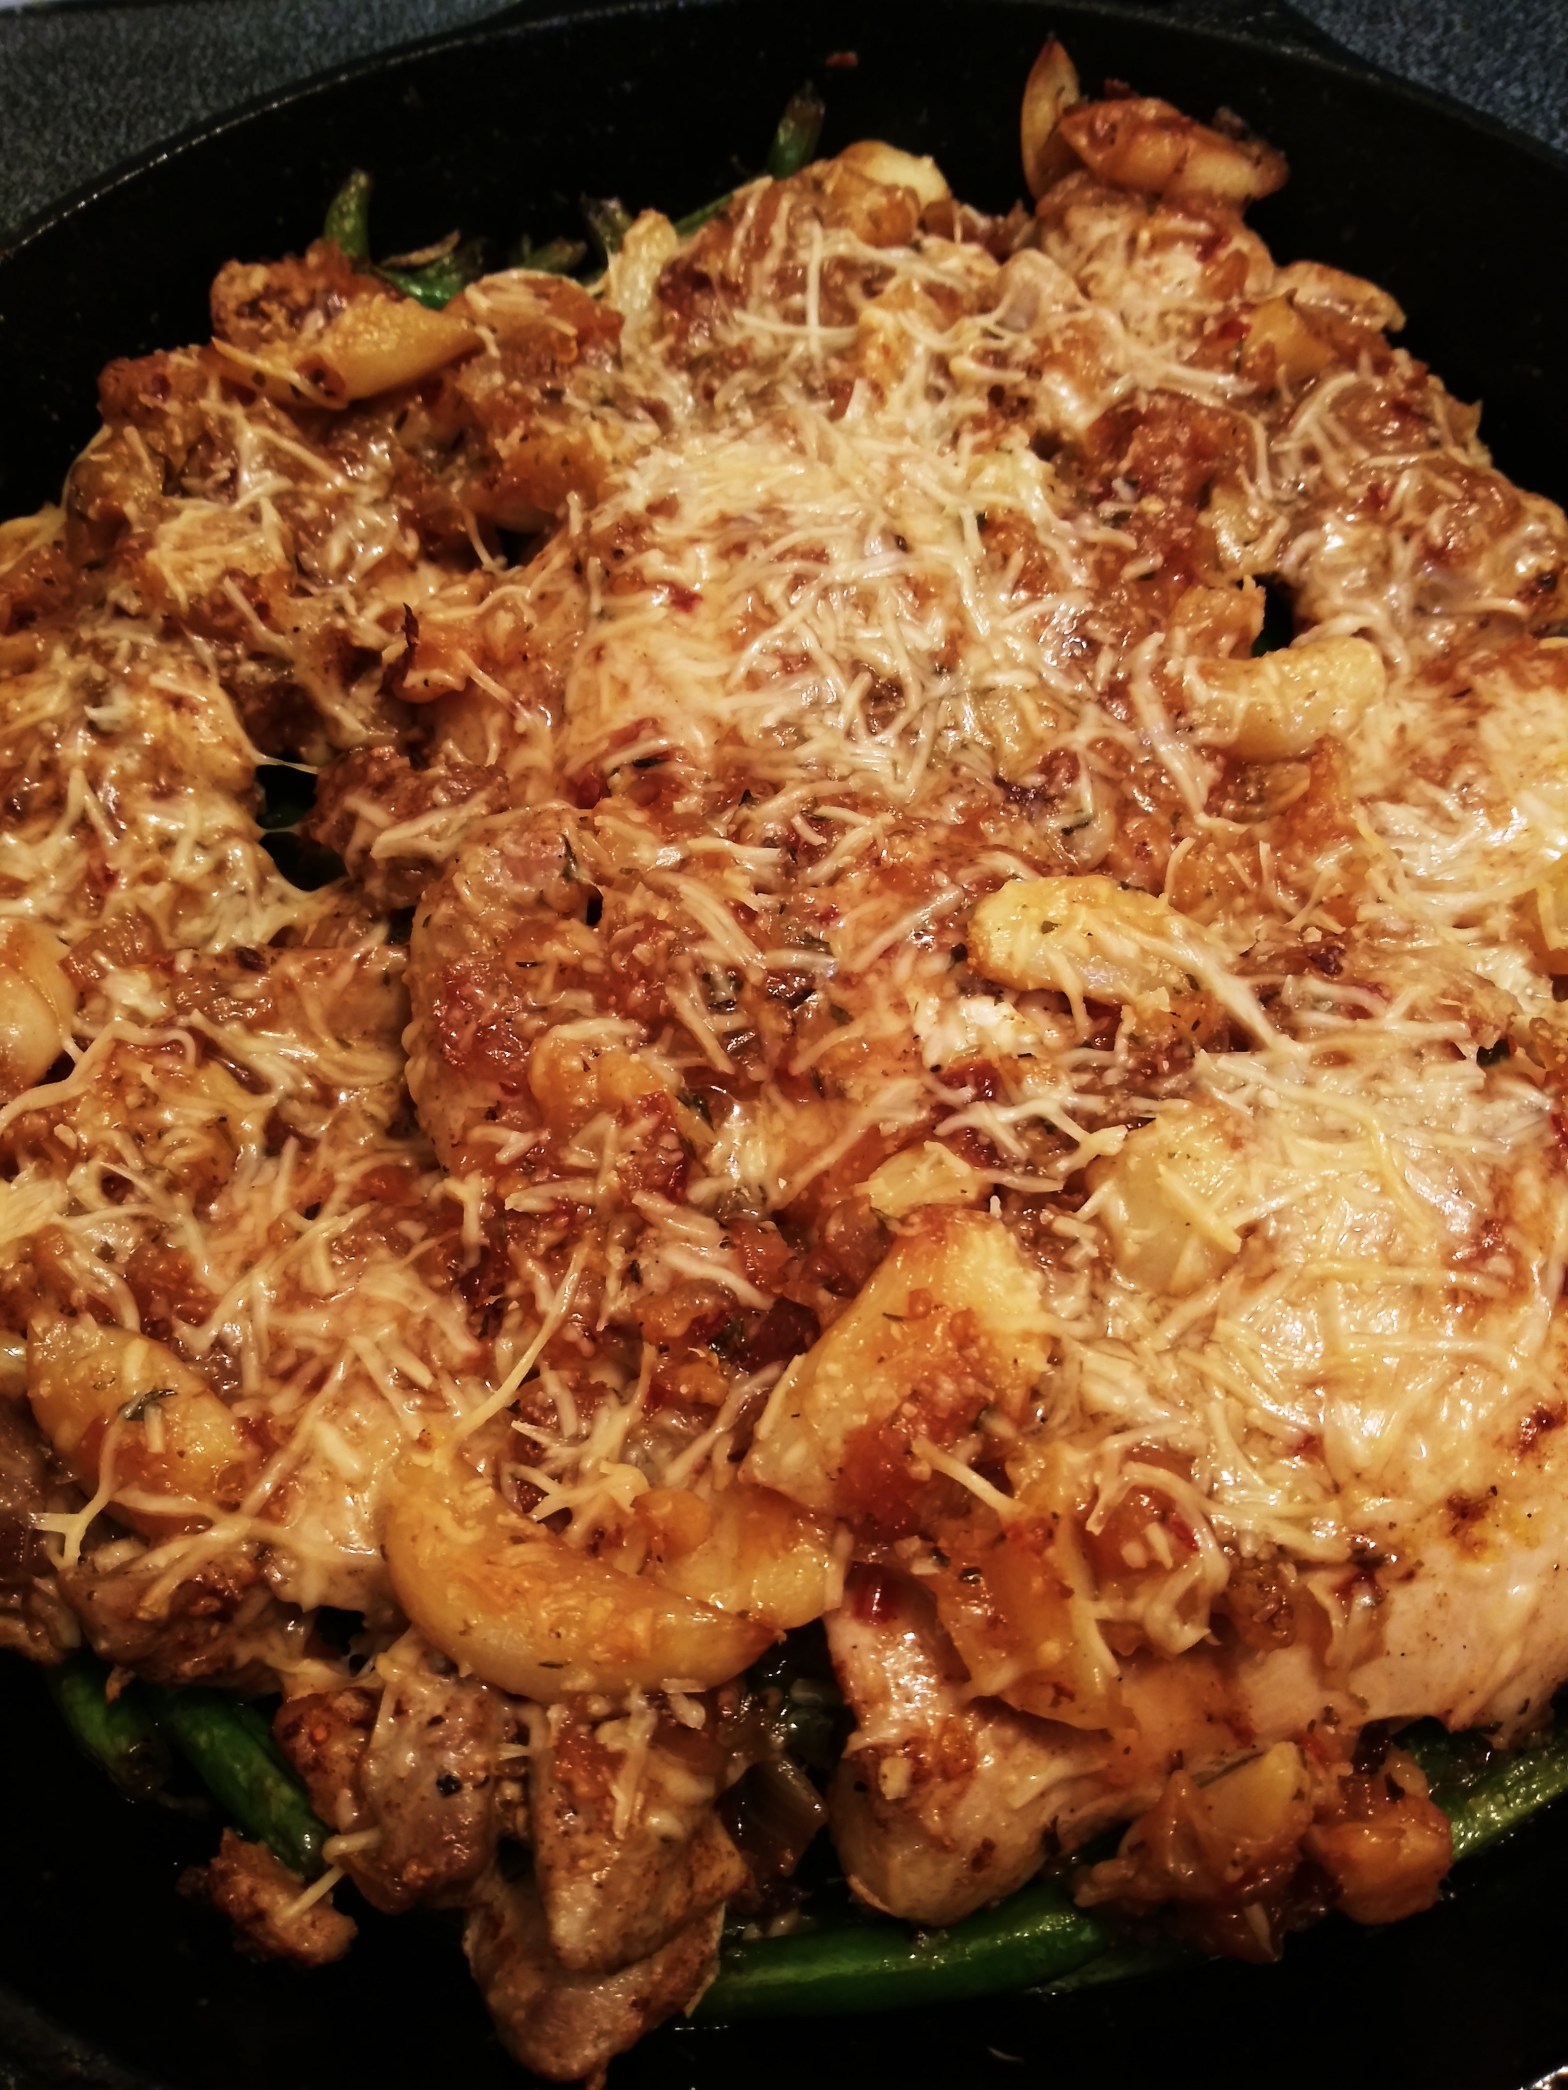
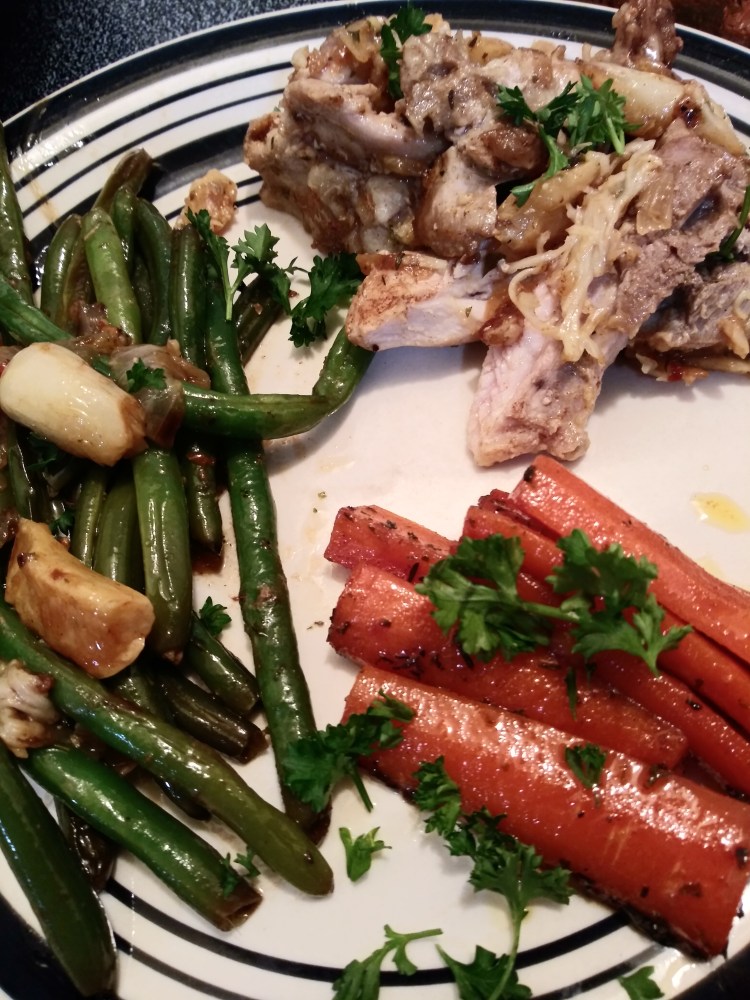
I make this with a side of green beans, which goes great with the garlic sauce. Top with parsley to serve.
I chopped up my chicken thighs and had green beans baking in the oven with the chicken. I also made herb roasted carrots to finish this dish as my carb.
After finally moving in with the significant other, I’ll probably be updating this more often since I now have access to a dishwasher, microwave, actual counter space, and good lighting. I had about 3 square feet of counter space at my old place and a range about half the size of a normal one, so it’ll be nice to have a full kitchen again. That being said….
I have been wanting to make this for quite some time, but every recipe I ever found online seemed to make this very heavy feeling, or didn’t use ingredients I was in favor of.
Ingredients:
Salmon portions
Cherry tomatoes, pint, halved
Heavy whipping cream
Lemon juice
Spinach, fresh
Tomato paste(2tbsp)
Butter
Basil
Garlic
Onion (sweet)
Parsley (to garnish; fresh)
Parmesan cheese
Red pepper flakes
Salt
Pepper
Butter
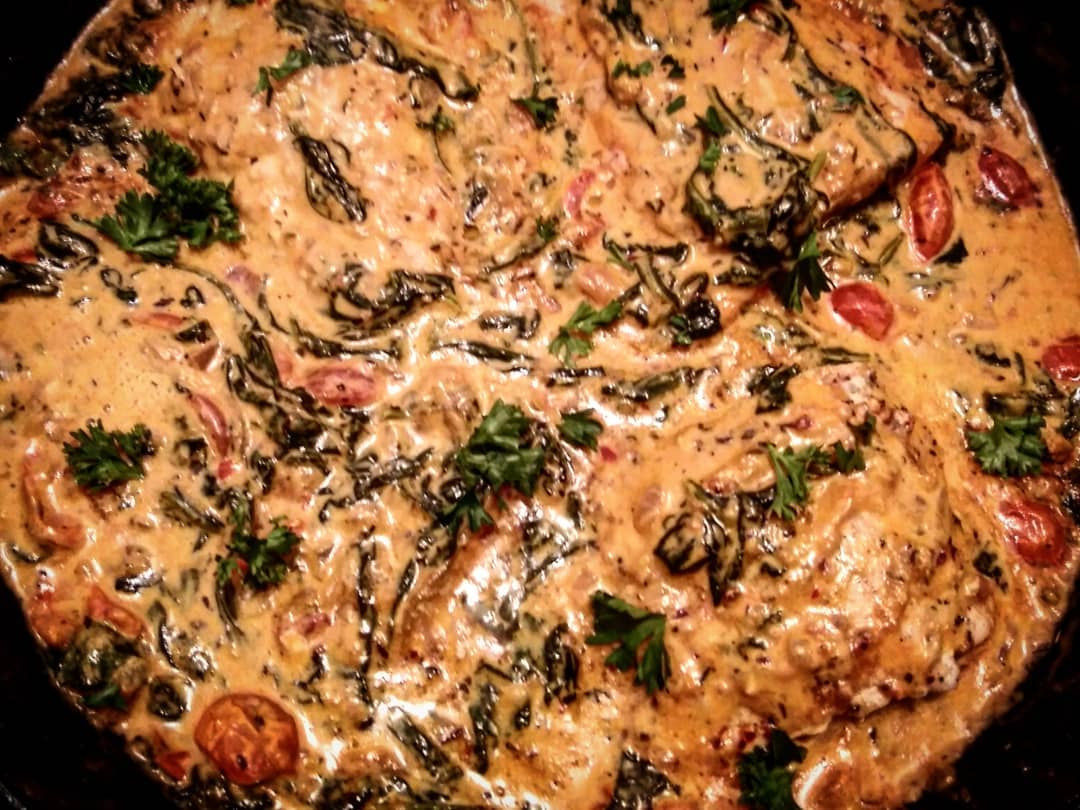
Concept: Saute onions until soft, add garlic and chopped tomatoes. Add paste when tomatoes begin to cook down, then slowly add in cream, spinach, lemon juice, and spices. Bake the fish on a cooking sheet until mostly cooked through; add fish to sauce and top with parmesan and bake until melty.
Instructions:
Take about 1/2 to a 1/3 of the sweet onion, dice, and caramelize over the stove over a medium to low heat. Use my other tip Caramelizing Onions if you need assistance with this. Butter, salt, and low heat oil is your friend. Traditionally, this takes a while. If you want to speed up the process, as the onions begin to become translucent, sprinkle white sugar. Otherwise, they’ll reach brown and buttery and delicious all on their own. Once they start to brown, add in minced garlic. We don’t measure garlic in this house, this you measure with your heart. If you’re using fresh garlic, add it when the onions go translucent, before they brown.
As the onions and garlic brown and get sweet, add in the cherry tomatoes. This will be another round of “just let it sit and cook”, as you’re waiting until they become wrinkly and darker. Add in a couple tablespoons of tomato paste as this starts to happen. As the tomatoes begin to thicken and redden, add in cream, a couple tablespoons at a time until the desired consistency is obtained. I liked mine a little on the thinner side so I had more sauce. I also used the other half of the stick of butter at this step, because butter is fat and fat means flavor. Add in spinach, and continue to cook on low until the spinach is softened within the sauce. If you accidentally made your sauce too thin, add some parmesan to the sauce to help thicken it.
About this time, have your oven ready to go at 350 so you can bake the salmon portions for about 15 with a generous helping of salt, pepper, and olive oil coating.
Finish the sauce with basil, dried red pepper flakes, oregano, pepper, and lemon juice to taste. The lemon juice will cut through a lot of the “heaviness” of this recipe. I used probably about 2 tbsp of it altogether. As for the salt, probably use more than you think, but taste as you go. Salt brings out all of the flavor and works in a “bell curve” style in terms of bringing out the goodness.
Once the sauce is done, put the fish into the pan with the sauce. Top with the parmesan cheese, and return this pan with the fish back into the oven until it is nice and melty.
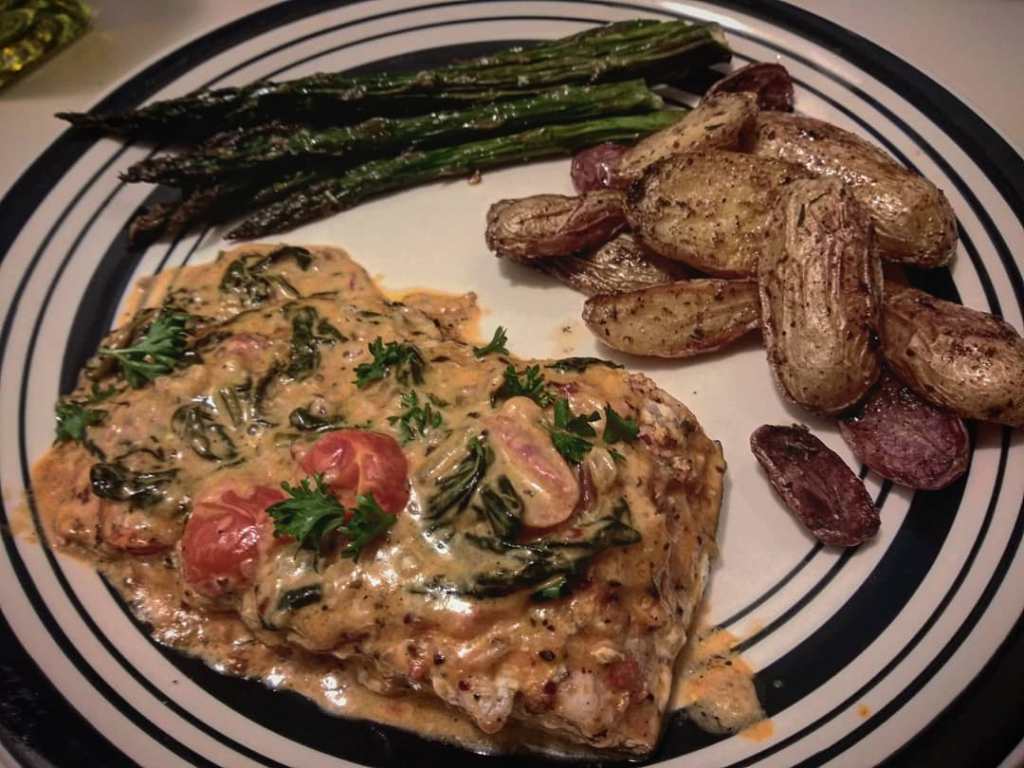
I sprinkled some freshly chopped parsley to help make the photo for this. Also pictured: roasted fingerling potatoes and asparagus.
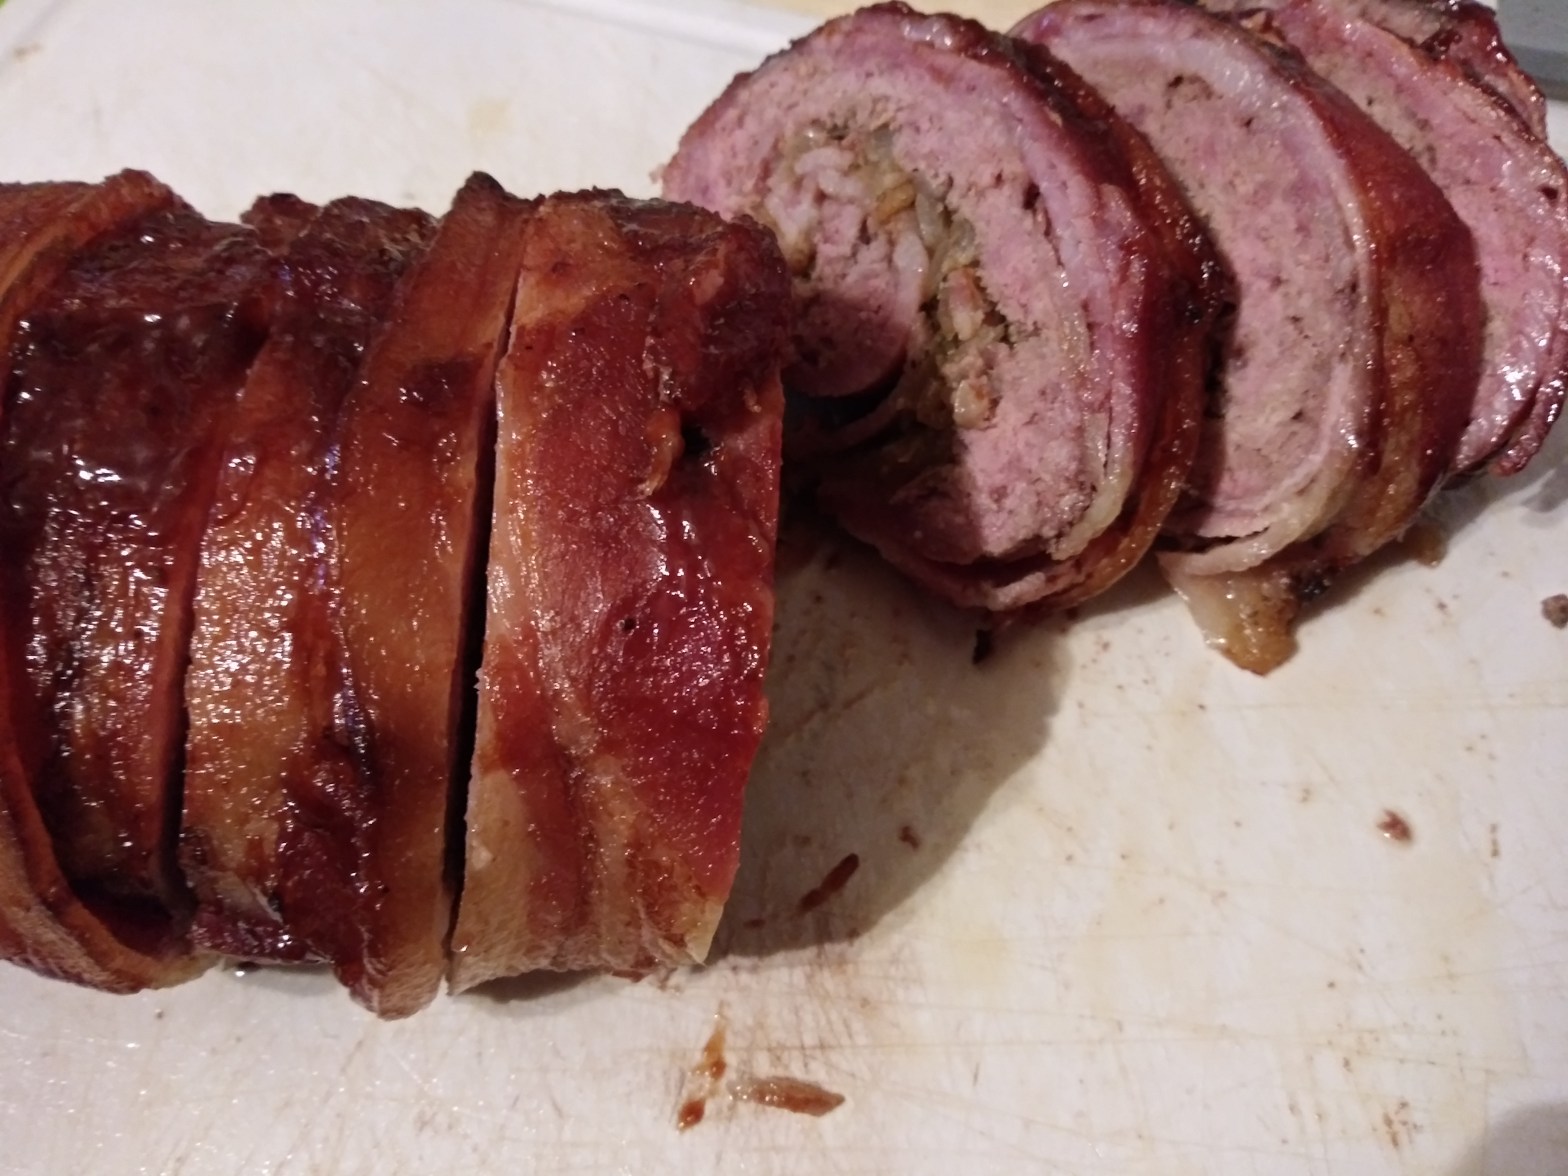
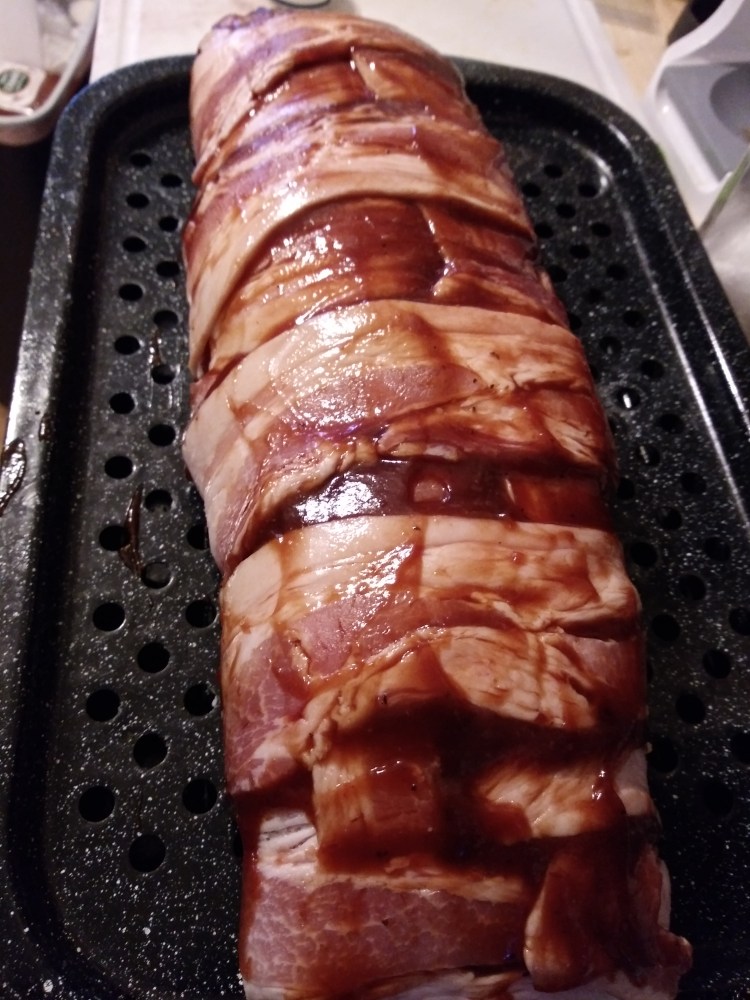
This is one of those fun recipes that once you make, people will be wondering about. Labor-wise, this might feel a little intense for some, but it comes out fairly worthwhile. I had gotten inspiration for this recipe from a friend whom I swap recipe ideas and inspiration with, as I was in the middle of re-marathoning Iron Chef and saw something that piqued my interest. They were doing some sort of roll as a play on sushi, but why not add bacon? Everything tastes better with bacon. Even bacon tastes better with bacon! That being said, anticipate on using a lot of it and learning how to weave bacon if you don’t already know.
The idea behind this is to take a sheet of woven bacon, put a layer of seasoned ground beef on top, and then your inside flavoring layer, aka the onions and garlic or whatever else you deem fit. Then roll up tightly, kinda like a sushi roll if you’ve ever made it, and then roast in the oven. If you’ve ever made pinwheels for sandwiches or other recipes, it’s along the same line.
Like a lot of my cooking, caramelized onions and garlic is at the heart of it. Don’t ask me why, I just genuinely love it. Besides, this would be going into the heart of the roll (see photo) to help keep it moist, and if it’s not going into the roll, then I recommend mixing it into your ground meat for flavor.
What You’ll Need:
1:1 ratio of thick-sliced bacon to ground beef (or pork) (1lb bacon, 1lb ground beef) 1 sweet onion, finely diced Minced garlic Garlic Powder Onion Powder Dried Parsley Dried Thyme Paprika 1 egg Butter or oil Your preferred bbq sauce
To get started, chop up the onion and place it into a hot pan with oil and begin to cook the onions down. Check out this post if you want details on how I like to cook my onions, otherwise just cook them until they’re at least translucent and then add the minced garlic and dried herbs. This mixture once cooked down, can be added to the ground meat for flavoring instead of the powders, but I typically just use the powdered goods in the meat and use this as a kind of “filling” inside the pinwheel, since the moisture from the oil and/or butter can help keep the inside moist as it cooks through.
On a large cutting board or clean surface, weave the pound of bacon slices together. I do this by placing one layer down and weaving in one slice at a time, perpendicular to the first layer. If you wanted to season the beef, which I recommend, put it into a large mixing bowl and add in a couple teaspoons of each of the dried powder ingredients, you can also add the herbs listed here as well. Add in the egg and make sure you mix this in thoroughly — this will help bind the meat together and keep it from falling apart after it cooks. Should you discover that your beef mixture is too wet, then adding in some flour or breadcrumbs might do the trick. If you’re low-carb or gluten-free like I am, then gluten-free options are available such as almond flour or ground pork rinds.
Layer the ground meat evenly across the woven bacon, careful to keep it within half an inch of the edge, but not exactly to the edge. Layer the next part of the onions and garlic combo on top of the beef, taking care to keep it within the same bounds. Take the base of the bacon and roll it tightly into itself, creating the tight pinwheel. I find rolling “hotdog” style, or the longer way, might be easier if your woven base isn’t perfectly square.
Wrapped roll on top of broiling pan
Place your monstrosity on top of a baking sheet or if you have it, a roasting or broiling pan, this way the grease can drip out and you’ll have a better crispy layer on top. Brush on your bbq sauce of choice, in this case I typically carry Sweet Baby Ray’s or Stubbs’ Sweet-n-Heat in my fridge and use that. Bake in the oven at 400F for about 40min and slice before serving.