Pork Green Chili

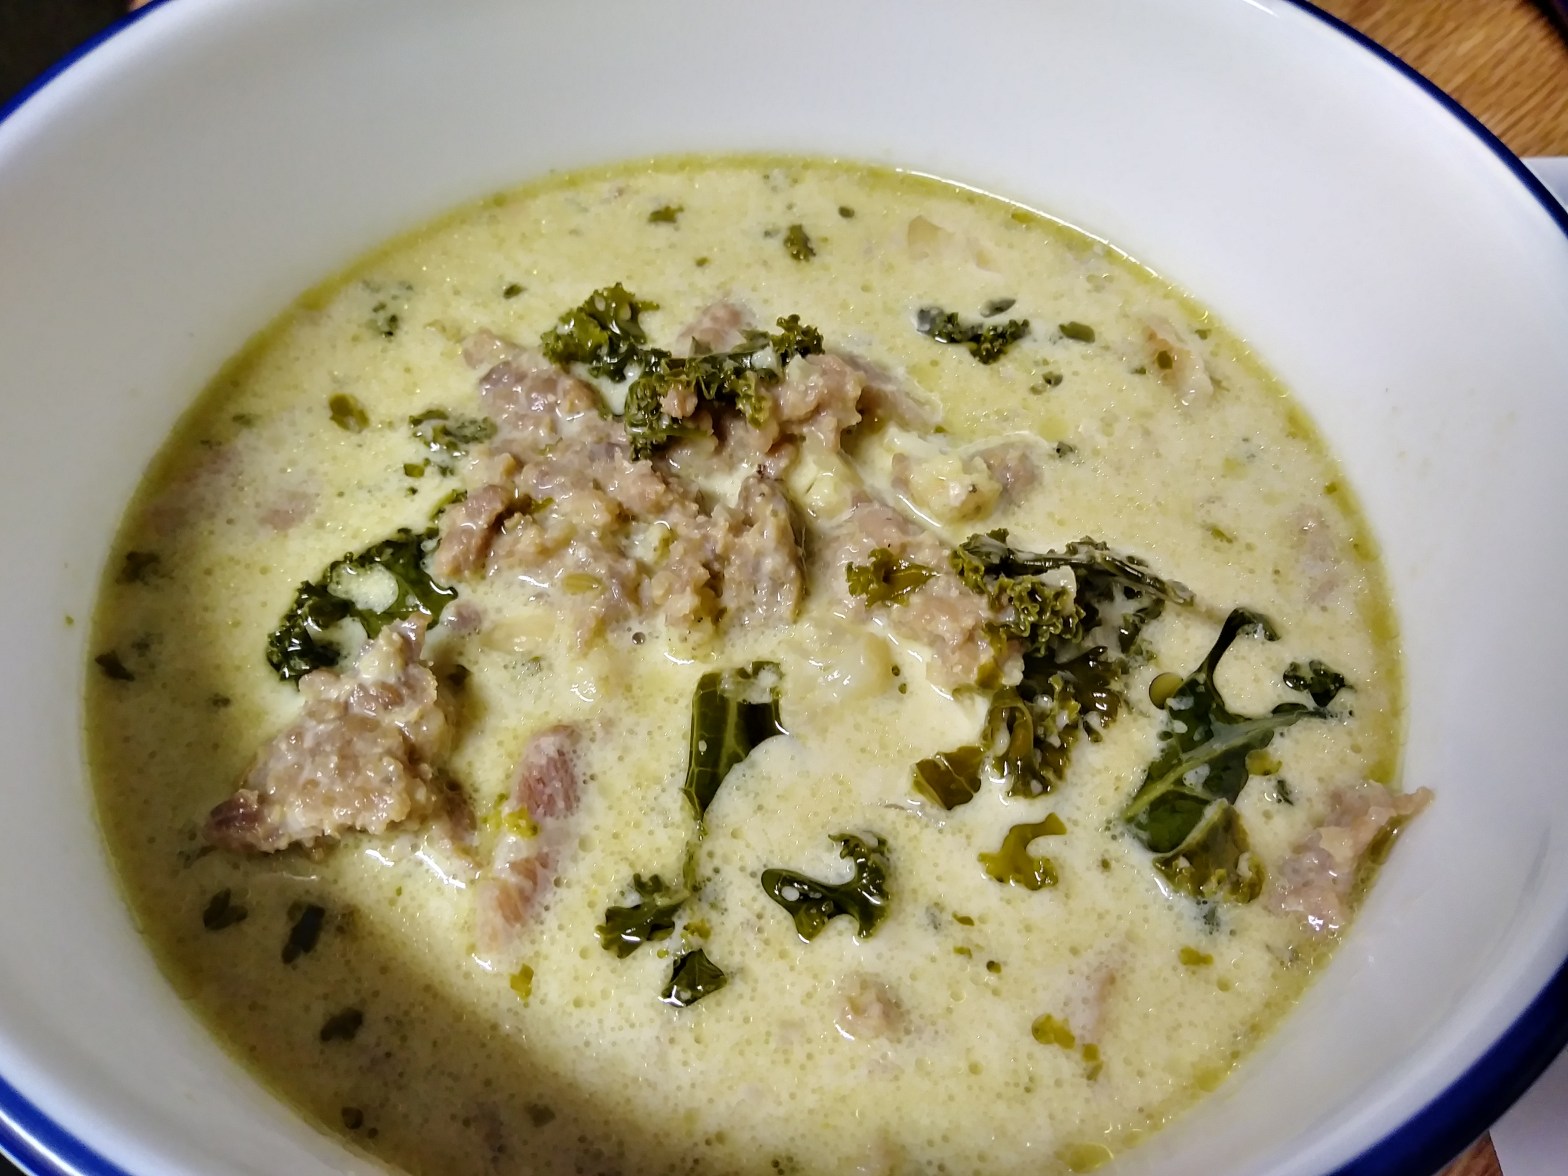
I made this for the first time and I couldn’t believe how simple it was. I had done some research ahead of time, but after living in the American Southwest for much of the last 6 years (I have a hard time telling myself that Colorado can be a part of that, but we do have Pueblo and Pueblo does have chiles, so….) I knew the relative palette I was going for. I include a little bit of smoked paprika in the recipe, but it’s not from the normal spice section, I had gotten this from the Hispanic part of my local grocer, which had a smoked paprika, chili powder, and crushed pepper combo that I love to put in sauces and salsas because it brings that smoky-heat that I love.

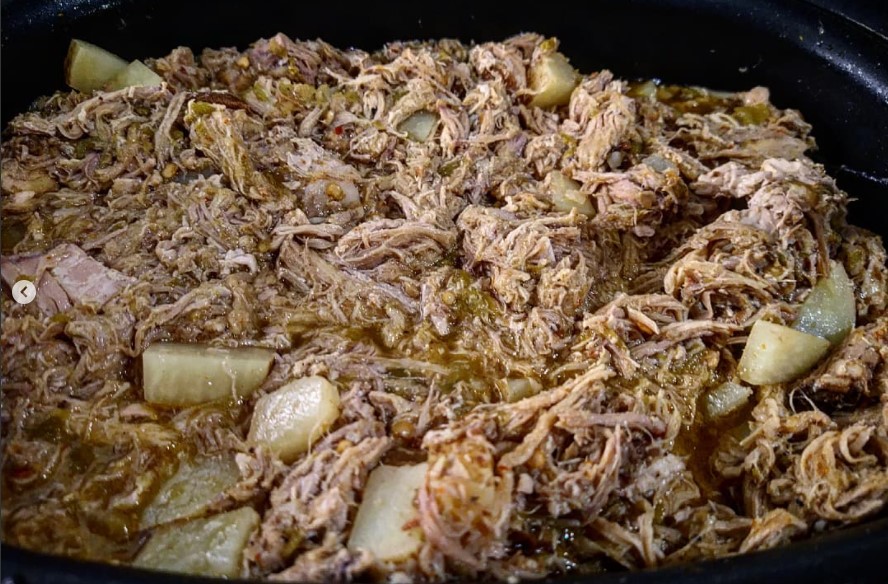
Normally, and for repeatable sake I’ll write it into the recipe, you take pork shoulder, cube it, and then fry it before putting it into the soup. I lucked out and I had gotten a massive (15lb) pork roast from a friend and while getting ready to host our monthly game night, someone had said they’d smoke it for us so we could have smoked pulled pork. Little did I realize just how much 15lbs of smoked pork was! Needless to say, we had a lot (a LOT!) of leftovers. Upon hearing that we had another holiday party coming up this week, what better way to use it than to make chili? And honestly I was wanting to learn and experiment with this recipe for a while now anyway. If you really want to replicate what it looks like in the photo, then you’ll need to cook this down for several hours so that the pork really becomes fork tender and shreds as you stir.

What You’ll Need:

Pork butt (or commonly called shoulder) roast, deboned and cut into bite-sized cubes
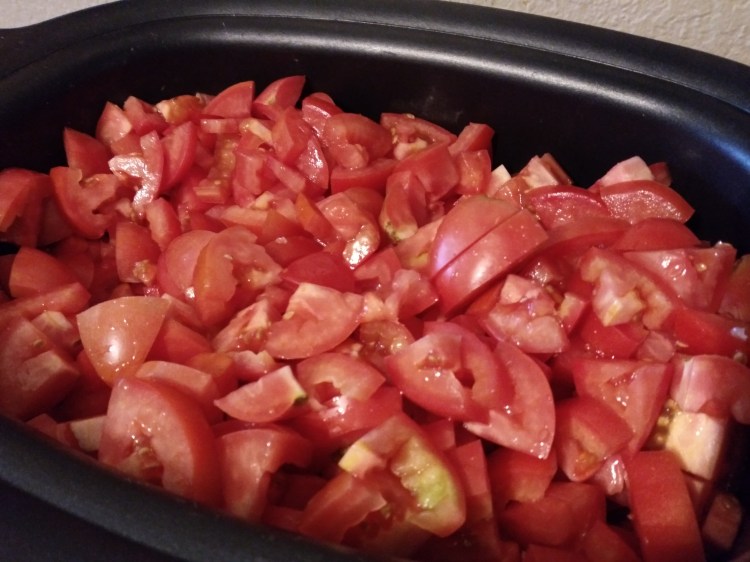
3-4lbs of roasted and chopped hatch chilies (commonly found in the freezer section)
Additional roasted chilies of choice (I love poblanos for the heat and anaheim for sweetness)
Red potatoes (optional)
2qts Chicken stock
Shredded cheese (optional, for serving)
Salt
Pepper
Whole onion, diced
Garlic
Smoked paprika (see intro for explanation)
Flour/cornstarch

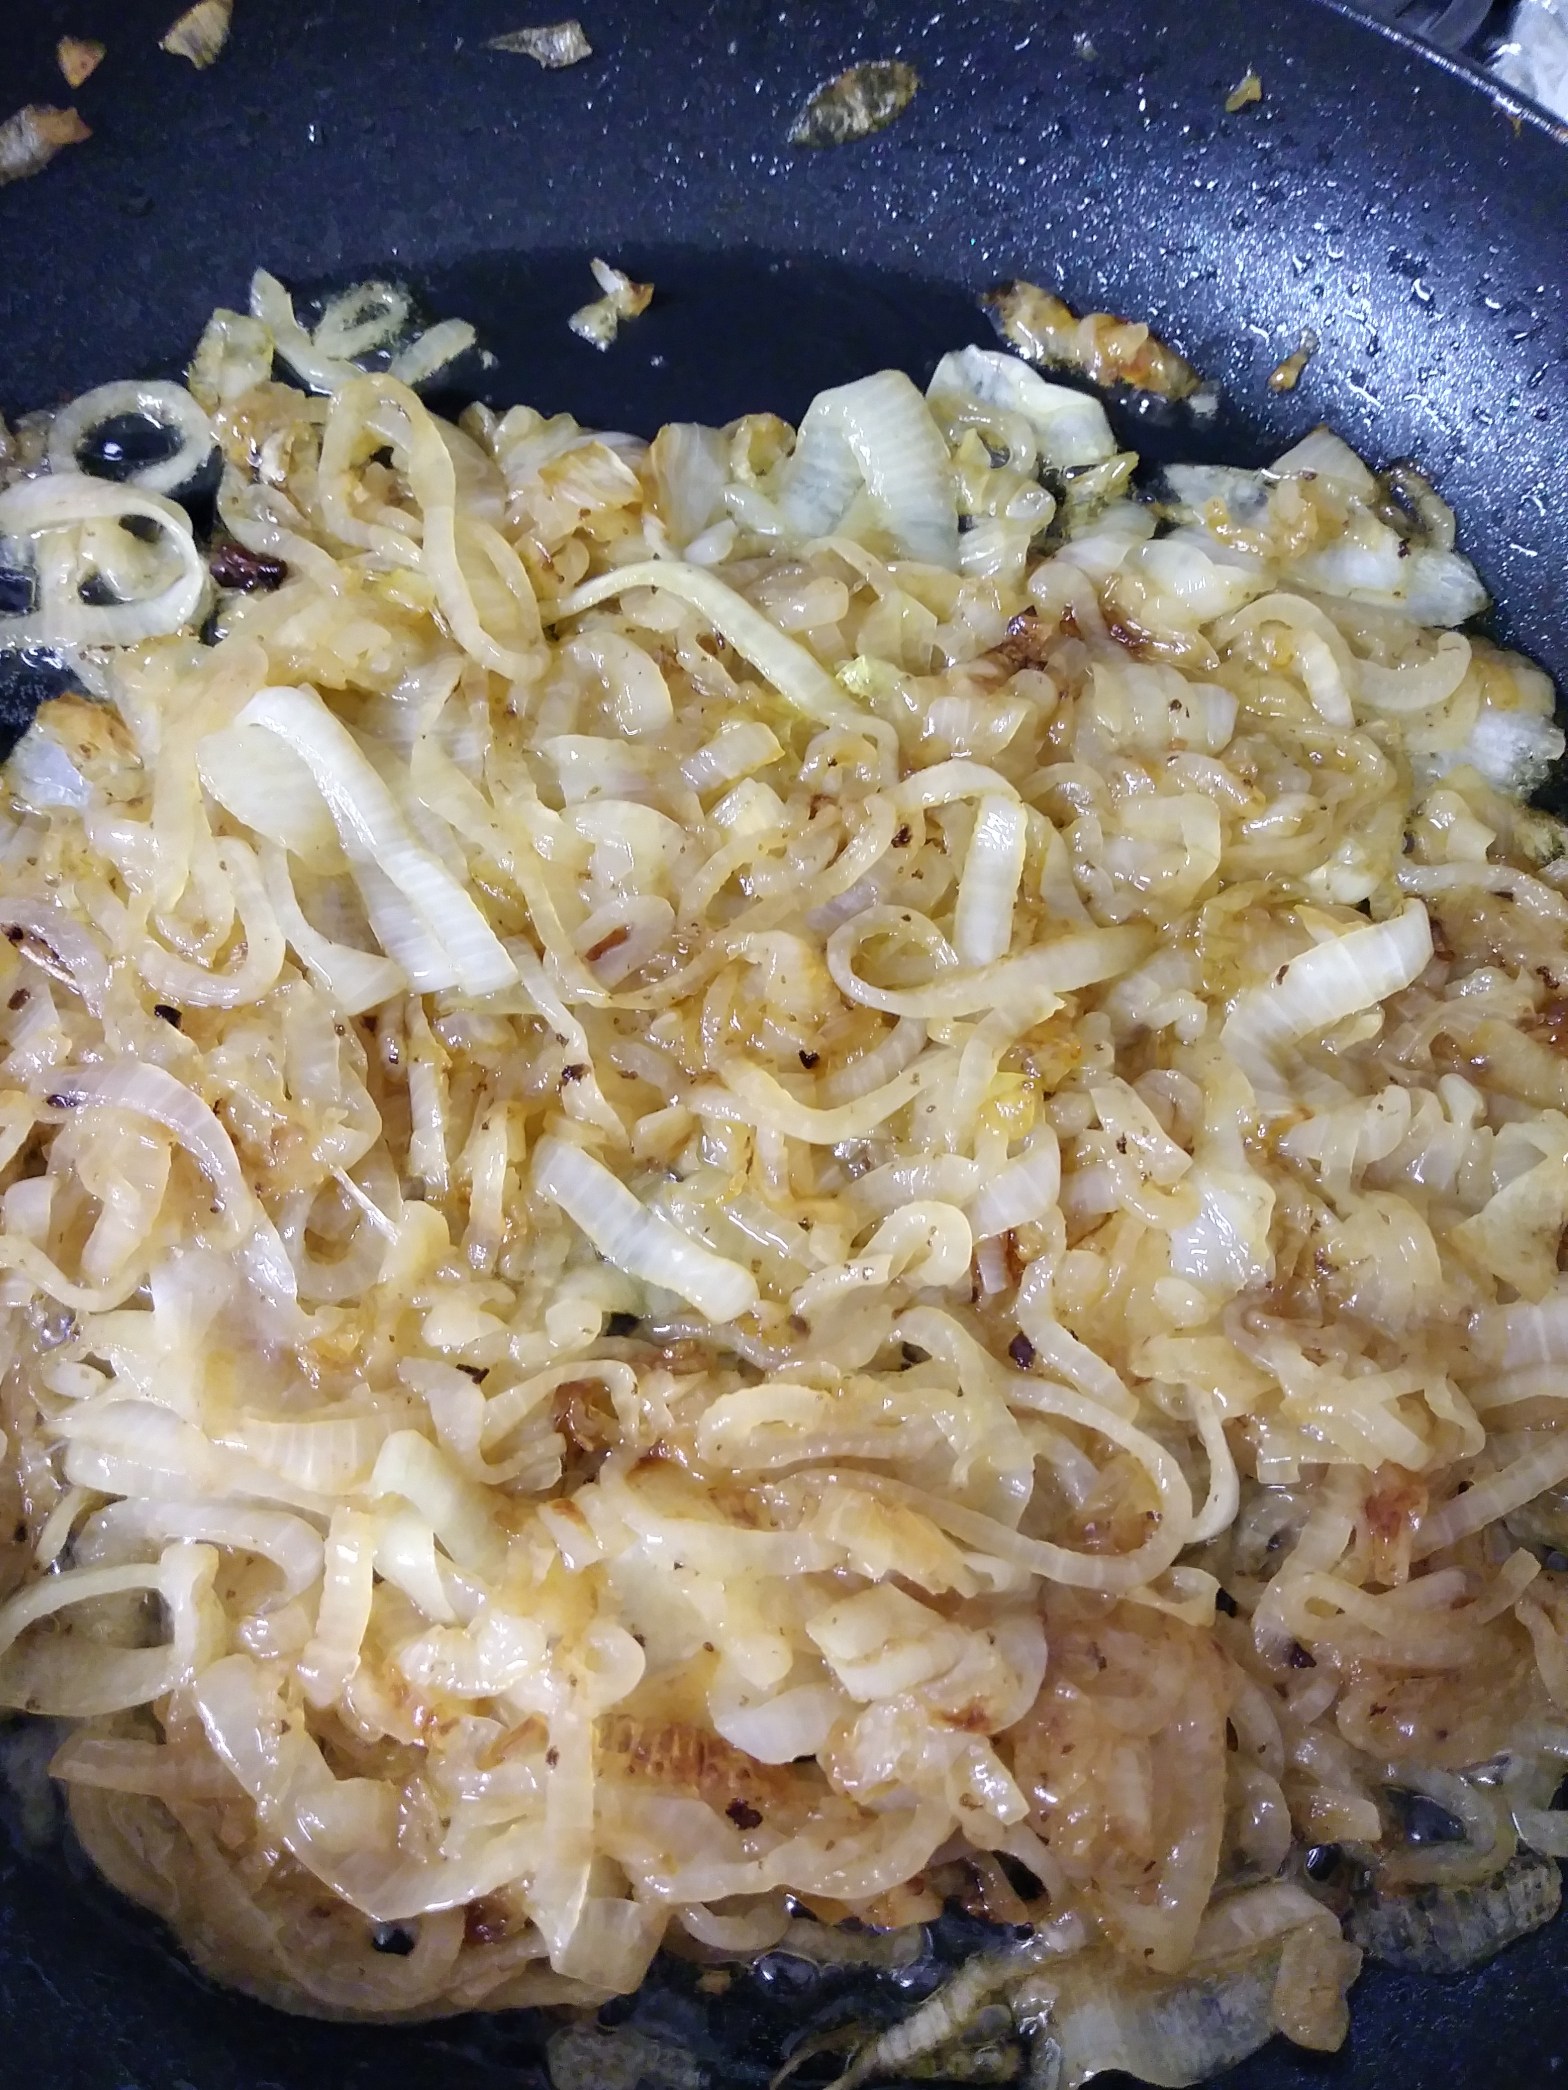
Dice up the pork into bite-sized pieces, and drench in some form of flour if you don’t want to do the later cornstarch method of making a roux. Fry up the pork so that it gets nice and browned before adding it to a large pot or crock pot. Next, dice up the onion and brown it in the pan, using oil and butter to aid in the browning process over a medium-low heat. Check out this tutorial if you need help.

In the large pot or crock pot, add in the chicken stock. I’m being very vague, but if you want pointers on what to use for stocks in your recipes, check out this other recipe here, (eventually I’ll separate out this information into its own tip post and when I do that I’ll update the link) where I go into a little further detail on what to look for at your local supermarket. A good stock or broth has a lot of flavor already in it and can only elevate your own home cooking.

Because I had bought a bag of frozen, pre-cooked and chopped chilis, I added it to the pot here. If you are going a more handmade route or you bought fresh chilis to add, then put them onto a baking sheet in the oven at 450F for about 5-10min per side, until the skin starts to peel or break on its own. You then need to peel the peppers and get rid of the seeds inside and chop them into smaller pieces. A lot of labor for such a simple part, but oh-so-worth it. I’ve also roasted my peppers on the grill for that smoky goodness added into it.

Once the onions and garlic are browned, add them to the pot and stir in salt and pepper to taste. Consider using a bit more salt, because salt is used to bring out flavor in a dish that you wouldn’t expect. There’s a sort of bell-curve when it comes to salting food, it’ll reach a beautiful pinnacle point before becoming actually salty. And it’s usually more salt than you probably think, so add some, let it cook into the soup, and then taste, rinse and repeat until you’ve reached a point where you can taste every delicious morsel of flavor from the dish. At this point I added a bit of garlic powder, which I know I didn’t add to the recipe list, but because garlic is one of those things that you measure with your heart and not any tools, I like my food with a lot of garlic in it.

If you’re putting potatoes into your soup, cube it into bite-sized pieces and you can add them plain into the soup. I had this mixture in the crock pot overnight, this way when I went to put it in containers for my lunch the following day, all of the flavors had come together and made a lot of happiness. Especially if you haven’t already cooked down the pork into fork tenderness, having it in the crock pot on low for 8 hours is a good way to get there. If you find that your soup is runny and thin, take a couple of ladles out into a separate bowl and put in a teaspoon of cornstarch into the bowl and whisk until all of the cornstarch is mixed in. A traditional roux uses melted butter and flour, but I just shortcut and use the liquid from the soup to begin with with cornstarch. Add the cornstarch slurry back into the soup and you’ll see it thicken up quite quickly.

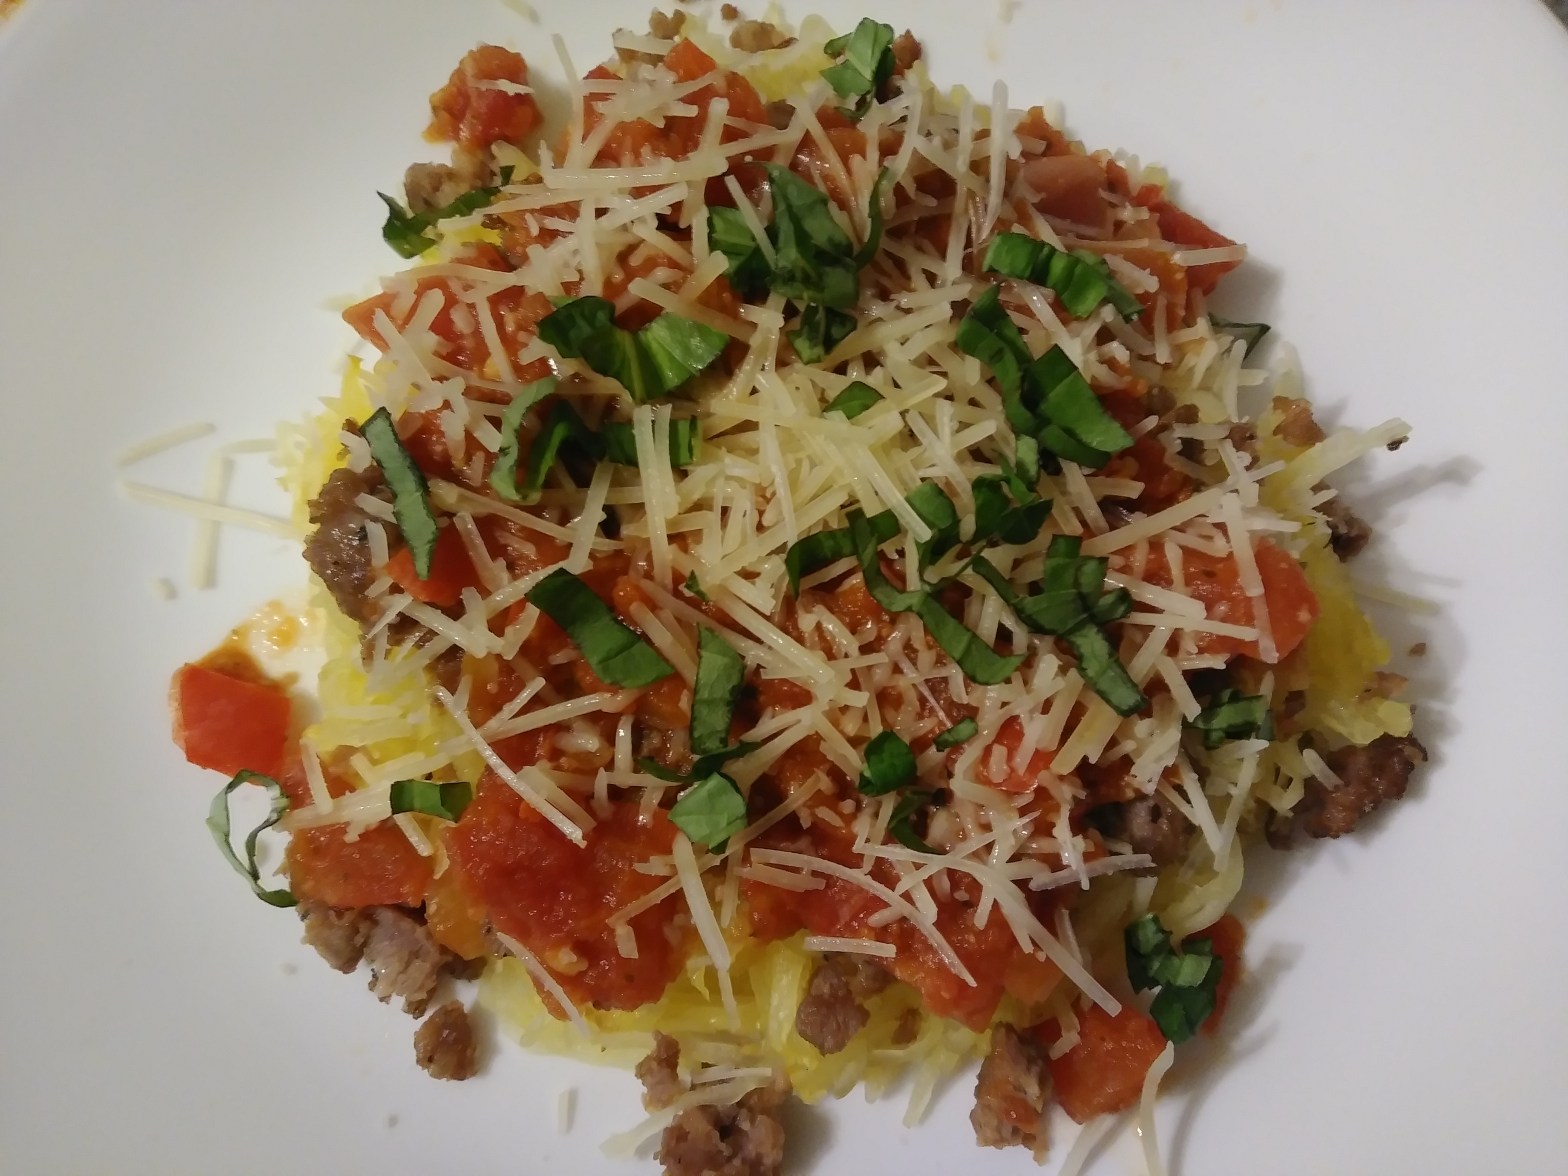
As you serve, feel free to add in shredded cheese. A sharp cheddar will do quite nicely, but I discovered a whole milk mozzarella will also do in a pinch.

Keto Zuppa Toscana (Olive Garden Copycat)

Can we finally just acknowledge that “keto” has become a buzzword now? Can we? Please? For those like me who can’t stomach gluten at all without getting really sick, it’s at least helpful because if I see this buzzword, it means I can usually have it. But for this recipe, it just means I’m omitting the potatoes. (But if you really, really need the potatoes here, I’m not going to say no, okay? Potatoes are food and food shouldn’t mean sacrificing yourself or making yourself miserable.)

So if you love being able to go to Olive Garden and get their unlimited soup/salad/breadsticks as much as I have, then you’ve probably come across their big win, the zuppa toscana soup. I think they’re the first place to get me to ever actually eat kale, I always thought it was a garnish. These days I’ll make it and I’ll go find some gluten-free bread and toast that up to have with it if I really feel inclined.

You’ll find a dozen and one different recipes out there with this title, but I want to tell you that this is my own spin on it, so bear with me here. Most of the recipes are fairly the same: italian sausage, onion, chicken stock, cream, kale… cooked in that order. I stick mostly to that, but, if you’ve read any of my other recipes, you’ll know that one of my favorite things in this world is buttery soft cooked onions and garlic, so of course I have to do those, too.

What You’ll Need:

1 Medium White Onion
Minced Garlic
1lb ground italian sausage (I prefer “sweet” if available, but “mild” also works)
1lb regular bacon, cut into bite sized pieces
1qt chicken stock
1pt heavy whipping cream
Salt
Pepper
1-2 bunches kale
Thyme
Bay Leaves
Parsley

Heat up your pan, add a little bit of oil to keep the meat from sticking, and add in the sausage, breaking it up into crumbles as it cooks and browns. Once the sausage is fully cooked, remove it from the pan but let the grease stay. (If you were adding potatoes to the mix, this is where I’d say cut into 1/2″ cubes and fry the potatoes until browned, then remove from the pan so you have room for onions if you’re using only one pan.)

In a separate pan, take the bacon and saute until browned. Keep the heat on medium-low to keep from burning, and toss occasionally. If you’re more averse to pan-frying your bacon, you can also take the slices and put it into the oven on a baking sheet at 400F for about 18 minutes or until your desired cook level.

Hot tip: take a cooling rack and put it on the baking sheet to allow the grease to drip and be separate from the bacon. It’ll make crispier bacon.

Dice up the onion and cook it on medium-low in the pan until the onions begin to brown and become translucent. I generally like to cook my onions in bacon grease if it’s available. I tend to cook them until they’re cooked down, using this recipe/tip I’ve already written, but it’s not necessary. Once you’ve reached this step, add back in the sausage, bacon, and the chicken stock and bring it to a low simmer for about 20min. I’ll add a couple (read: 2-3) bay leaves and about 1/2tsp of dried thyme while the soup simmers. After that time has passed, add in the cream and let it come back up to temperature while you chop up the kale into bite-sized pieces while avoiding the stem. About 5 minutes before serving, add the kale and about a tsp or two of parsley into the soup. Salt and pepper to taste.

Crispy Chicken with Sweet Caramelized Onion Cream Sauce

This is one of the few recipes I’ve actually used sugar in. Sorry, not exactly low-carb, unless you have a good sugarlike substitute at the ready and are willing to risk it. Or you just omit the sugar and just enjoy the caramelized onion cream sauce. Whichever suits your fancy. Sugar or not, I really quite liked this recipe and trying this one out to see how it would work. I had a hankering for some old maui onion style potato chips when I created this, a brand from where I grew up back in Connecticut called Deep River Snacks used to make it and I remember that flavor fondly.
The idea behind this recipe is to caramelize a ton of onions, all diced and buttery and sweet, add in some cream, and then a lot more onion powder and a sweetener if desired. But the concept is to make it taste like what it sounds like: a creamy onion-y sauce. I then have it in the cast iron and put the chicken in once I make the sauce and finish it in the oven so that the bottom of the chicken can start to absorb those flavors. This concept can also go well with chopped mushrooms and garlic as well, so I’ll put that into another post as I have a separate mushroom/garlic cream sauce that I very much like.

A lot of my photos and my recipes have chicken thighs — if that doesn’t suit your fancy, other chicken cuts can be used as well, but I quite personally like having crispy chicken skin. A good secret to getting that crunch is getting yourself a good roasting pan. I actually use what’s called a broiling pan, and it’s my go-to because like roasting pans, it allows liquids to drip and so the food won’t be soggy at the bottom. It’s also my secret to crispy bacon, I use an oven or drying rack over a baking sheet to allow the grease to drip. At this point I’ve been using it for probably closer to 4-5 years, so it’s served its purpose well and gets used several times per week, if not daily for my morning breakfast before work. The exact one I have (with link) is below:

Broiler Pan from Amazon
https://www.amazon.com/Granite-Ware-Broil-Grill-3-Piece/dp/B000MJYE8I/ref=sr_1_4?keywords=broiler+pan+granite&qid=1576430400&sr=8-4

What You’ll Need:

Oil
Onions (2-3 medium)
Heavy whipping cream (1 pt)
Garlic
Onion Powder
Garlic Powder
Sugar (optional)
Butter
Parmesan (grated or shredded)
Salt
Pepper
Paprika
Crushed Red Pepper
Chicken thighs (bone-in, skin on)
Baby spinach (optional, since I do have it in the photo for the recipe)

The first thing you’re going to want to do is dice up the onions and add them to a medium-hot pan with oil and salt them and get that process going of caramelizing the onions. Because I don’t typically use sugar when I do this, it takes a while so I’ll usually get that started before I go to prep my chicken. For more tips and information on caramelizing onions, click here, and it’ll redirect you to my page on that topic. This is also where I explain when to use the butter.

Get the oven ready at about 375, and put the chicken thighs on the roasting pan, rubbed down with salt, pepper, a little bit of oil, garlic powder, onion powder, and paprika. Do an even amount of each type of seasoning with about a 1tsp of oil. I usually put all of my dried seasoning into a bowl this way I can see how much I’m putting in, mix, and then coat the chicken with it. My momma always said that so long as I season my chicken well, I will always have luck and good tidings. (And consequently, a handsome man [or partner] to feed.) Can’t fault that logic, so therefore, we season our chicken in this house.

Tip: The oil on the chicken allows for it to become crispy in the oven, and allows for a better spread of seasoning.

The chicken will take probably closer to 45min to cook if you have a lot of chicken in the oven. You’ll know when it’s done when you can put a fork into the center by the bone and the juices will run clear, so keep a tender eye on it. But that time will give you a reasonable time to get the onions soft and sweet. If you want fresh garlic, and I always do, as the onions begin to brown a little bit, add in some minced or fresh garlic to the pan and let that cook down with the onions. Once it’s browned, turn the heat down low and slowly add in the heavy whipping cream, probably closer to a couple ounces at a time.

Tip: Heavy cream at a high heat might have a chance to curdle, so we always turn the heat down low and add in a little bit at a time.

Because onions reduce when they get cooked down, it doesn’t have a whole lot of flavor once the heavy cream is added, and that’s okay. Add in a couple tablespoons of the parmesan cheese to help add depth to the sauce. Now this is where we add in the onion powder. It’s going to be a lot, so estimate probably closer to 4tbsp and let that mellow and cook into the sauce.

Tip: When adding raw or powdered seasoning, let it cook down into the sauce before tasting, taking a minute or two at a low simmer. This is because the uncooked flavors of powdered seasoning won’t mellow and it won’t be consistent in flavor.

If you’re adding in sugar, this is where you add it in, probably 3-4 tsp will do, tops. Add in 1tsp at a time and allow it to cook into the sauce before adding more, as a little can go a long ways.

As the sauce begins to thicken, if you want to add baby spinach for color, this is where you can add a bag of fresh spinach, but about a handful at a time if you’re not using a deep pan, and just let it cook down into the sauce. The sauce should taste creamy and much like the caramelized onions, and I sometimes top it off with about a teaspoon of paprika for color. I’ll then add the chicken to the pan, skin-side-up, and then put it into the oven at about 300 for a few minutes to help finish it.
I’ve personally served this with garlicky green beans as a side or roasted potatoes, as something starchy goes well with this sauce.

French Onion Soup Chicken

It’s rich. It’s got a little crunch. It’s highly addictive. It’s… french onion soup chicken??
When you boil it down, it’s almost like a chicken parmesan atop of a reduced french onion soup recipe, but I’ll be damned if it isn’t absolutely delicious. I like it because it combines my love of French Onion Soup and that deep richness of flavor from the broth and then a chicken parm style recipe on top.

What You’ll Need:

Onions (probably 2 medium)
Garlic
Beef Broth
Thyme
Bay Leaves
Chicken, boneless, skinless
Grated Parmesan Cheese
Shredded Mozzarella Cheese
Eggs
Bread Crumbs (panko brand preferred, they also have a gluten-free version)
High-heat oil
If keto: Parmesan cheese and crushed pork rinds also work in a 1:2 ratio of cheese to rinds.

The base of this will take the longest, so I suggest slicing and caramelizing your onions first. This means low and slow cooking, and basically plotting how you’re going to impress your guests or the rest of your household with whatever side dishes you want. Or in my case, how I’m going to taunt my coworkers with the smell of this deliciousness in the break room. Once they start to brown, add in some fresh or minced garlic and let that brown with the onions.

Tip: When using fresh cloves of garlic, take the heel of your palm (or the flat side of your knife) and press down onto the clove to open it. This will allow the release of the aromas and flavors within.

I’m also going to reference the French Onion Soup recipe I have here, because I want to use it to highlight what you can use for broth. Instead of doing a lot of liquid to cover up the onions, only do enough to barely cover them, adding the thyme and bay leaves. Instead of a slow simmer, feel free to boil the liquid out for this, as we’re not using a lot of stock and we mostly want that flavor into the onions without a lot of liquid. I’ve seen some folks use cornstarch to try to thicken it up and make a roux instead of doing a pure reduction, which isn’t a bad idea.

While the stock is reducing, get ready to fry up the chicken. Dip it in egg and then breadcrumbs (or a breadcrumb style mixture) and fry it in oil to crispen it up. I like to make a quick fry and then finish it in the pan in the oven at 350 for about 10-15min. So once all of the chicken is fried, put it into the pan with the reduced soup, top with copious amounts of cheese (because, cheese) and then bake.

When plating, put the french onion soup reduction on the bottom chicken on top, and then feel free to drizzle a little bit of the liquid on top of the chicken.

French Onion Soup

Concept to make this is to cook down sliced onions until brown and almost syrupy, add in flavorful reducing liquid such as wine and Worcestershire, and then cook into beef stock until the flavors mellow.

The best broth is always going to be the one you make yourself, but if you don’t want to spend a day making it, these will do in a pinch. Below the ingredients, I have photos of the types of pre-made stocks I prefer to keep around.

What You’ll Need:
Beef broth, 32oz
Red wine (optional), 1 cup or 8oz
Worcestershire sauce, 3oz
Balsamic Vinegar, 2oz
Onions, minimum 2, thinly sliced
** Red hold firmness best, but can use any type, I like sweet/vidalia
Butter
Olive oil
Thyme
Bay Leaves
Shredded Swiss and/or Mozzarella and/or gruyere cheese
Toast/Croutons (optional)

Image result for beef bone broth
Kettle&Fire Beef Bone Broth
Image result for beef bone broth
Walmart Brand Beef Bone Broth
Kitchen Basics® Original Beef Stock | Kitchen Basics
Kitchen Basics Beef Stock

I’ve also used the powdered form from Lono Life, while it isn’t as dark, it does have a nice flavor to it. When looking through your local grocer, look at the ingredients on these versus your typical Campbell’s or bouillon cubes. You’ll see ingredients like “beef stock” versus “beef flavor” and a large difference in sodium and protein content. A good broth might even have potassium in it as well as other minerals, it’ll be a whole meal in one liquid. Kettle&Fire will set you back the most with the cost, but the other two are fairly reasonable. Sam’s Choice is owned by Walmart, which I typically find at their “Neighborhood Market” style locations, and the Kitchen Basics I can get at Kroger supermarkets. It’s not as good as the other two listed, but Kitchen Basics I’ve found to be the best at my supermarket. If you have other brands at your store, I suggest going through them to see their nutritional labels to figure out which one will suit best.

*****

Slice at least two onions up and add them to a pan under low-to-medium heat. Use plenty of butter, oil, and salt to help reduce the onions until they are brown, sweet, and almost syrupy. This might take a while, be patient!
I’m going to link another blog post for Caramelizing Onions here, in case you’re interested on more instructions.

Once you’ve caramelized your onions, add them to a deep pot and add in the wine, Worcestershire sauce, and balsamic vinegar and crank it up to a high simmer. Reduce until you can scrape a spatula at the bottom of the pan and the liquid does not immediately refill. Pour in the beef stock. Some people would be done at this step, but I like to let it simmer for about a half hour on low at this point, to allow the flavor of the beef broth get into the onions. This is where I add about a spoonful of dried thyme and a couple of bay leaves to help give the dish a little more depth this way those herbs can work themselves into the broth while it’s simmering.


After you’re done, separate it into individual serving dishes, and top with the bread of your choice (or if you’re some varying form of gluten-free or with celiacs like me, I use Milton’s brand crisps) and then the shredded cheese and broil until cheese is bubbly and browning. And ta daa! You can impress your guests and just about all you really did was cook onions! But the broth will be so good, they’ll never know the difference 😉

Featured image: Courtesy (c) Great British Chefs.
I’ll update the featured image with the next time I make a batch

Caramelizing Onions

Now this isn’t a recipe per se, but this will be created as a reference point for my other recipes, as I tend to do this a lot in my own cooking. It’s one of my favorite parts of a recipe and once it’s done, I can honestly just eat this by itself because it’s just so sweet and buttery and absolutely delicious.
I had learned this art from my dad, who always made his onions low and slow whenever he cooked, usually with various meats and even as a side dish. When most people caramelize onions, they add sugar to the recipe, but honestly if you’re patient enough, you can get the same exact result without the added sugar. A lot of recipes have you stop when the onions become translucent, but that’s just the START of when they become sweet, and I don’t mean just those “sweet” onions you can get at the store, I’m including red onions in this mix, too.

What You’ll Need:

Onion
Low-heat oil
Butter
Salt

I’m not going to list a particular type of onion on this recipe, so I’ll leave it up to you for whichever recipe you’re using this for. But start by cutting off the top of the onion, leaving the base intact so that the onion stays together. This will allow you to peel the first layer off of the onion with the rest of it still intact. Aim for the first layer of what looks super thin by the top, while it’ll look like a regular onion layer towards the bottom, I can assure you you can still peel that and not worry about a stringy part of it later.

Cut across the onion, right at the red line.

Next, put the flat side of the onion down onto the counter (or cutting board) and slice it in half. Take half of the onion, lay it flat side down, and if you’re only going to use slivers of onion and not dicing it, you can slice it down to the root here. If you’re dicing your onion, there’s an extra step but I promise it’ll make your life a lot easier. Take the edge of your knife and point it towards the root, while the rest is perpendicular to the flat edge from cutting off the top, and slice downward, making 4-5 slices like this across the onion through the layers. Then you can slice across the onion so that each piece comes out already diced, like below.

Image result for dicing onion

Get a pan ready on the stove, it doesn’t need to be super hot before you add oil into it, for this we’re going to start off on a medium temperature and then cook on medium-low for the remainder of this process. Use a low-heat oil (like olive oil) to give a light coating to the pan and add in your onions. Next you need to salt those onions… No, salt them some more. Salt it like the ocean. You know how putting salt on meats and fish can help draw out moisture so it can start the curing process? Same deal, we’re going to draw out moisture and the sweetness. If you’ve ever put salt on fruit (or salty additives like tajin) then you know what I mean by bringing out the natural sweetness.

The goal is to occasionally stir this pan as the onions begin to brown and cook down. Once they show a little bit of browning, turn the heat down and just let the heat do its job. I typically put a cover on the pan because for starters, your house is going to smell like delicious onions for a while and it’ll make everyone hungry, and second, that evaporating moisture can go back into the pan. If you ever pop by and see that your pan looks a little dry, add in a small sliver of butter and stir it in. I use probably a couple tablespoons every time I make this because it takes sometimes 45min to an hour to make properly. You’ll know the onions are done when they’re dark in color and completely soft.

Braised Pork Belly

It’s fatty. It’s meaty. It’s soft. It’s delicious.
And if you’re not careful, you’ll eat a lot of it in one sitting.

If you want to do this right, it’s going to take a couple days’ worth of prep time, which is why this is one of the more complex recipes that I make. This prep time involves a hefty amount of salt and then another day inside a marinade, so if you’re prone to procrastinating or just really busy for two days before you can cook it, the full prep will work well for you. It’s not mandatory to do this, but the meat does come out softer and the skin crispier. 

I also have a habit of topping it with a thai chili sauce (“ma ploy” brand from your local supermarket or international market if you have one) which is this tangy and sweet and a little spicy and is absolutely addictive. 

What you’ll need:

Pork belly, unsalted and uncured
Coarse salt
Soy sauce
Mirin or rice wine
Ground ginger (or fresh sliced)
Crushed red pepper (or fresh peppers, like thai chili, jalapeno, serrano)
Pepper
Thai chili sauce (optional)
Garlic
Sesame oil
High-heat oil

Day 1:
Take the pork belly out of its wrapping, and coat in a generous amount of coarse salt, paying particular attention to salt the skin. Store in a sealed container, skin side up. The salt is going to bring out the moisture from the pork belly, drying out the skin and reducing some of the liquid inside the meat. If you do this step, you’ll see liquid form in the bottom of the container over the next day that’ll be drained before cooking.

Day 2:
Making the marinade today. Now I like to let it sit overnight kind of deal, which is why I have this sectioned off as “day 2”. Your goal is to not fill up the container of marinade, but maybe up to an inch into the container. Use similar ratios of soy sauce to mirin (or rice wine). About a tsp of sesame oil, and then the rest of the dry ingredients. I like a lot of ginger, so I’ve used up to an inch of fresh ginger or a whole tablespoon of ground. Garlic isn’t something I measure with a tool but I measure that with my heart. I also like having a little spice in my marinade, as the pork will absorb it. This marinade will also be what we cook it in eventually, so use as much spice as your little heart desires. Then put the pork back into a container, skin side up.

Day 3:
We cook!
(Unless you just skipped to this step, in which case, prep your marinade described above in day 2 and put it into a baking dish. We’re cooking in that sauce.)
Get yourself a pan nice and hot on the stove, with a couple of tablespoons of the high heat oil in it. We’re going to sear and brown the skin of the pork belly, which crispens it for cooking. This process takes a little bit, but when it’s done the skin will feel very hard and browned. Put the pork into a oven-safe dish skin-side-up and put the remainder of the marinade back in. Put in enough water to get close to the skin of the pork. Cover in aluminum foil and bake at 400F for about 2 hours (depending on how long your Netflix episodes are!) This is to get the pork up to an internal temperature of 165F.
Then take the foil off, top with the chili sauce if you have it, and bake at 250F for another 2 hours. If you notice your pan is dry, feel free to add some water. The idea is to cook it slowly in a little moisture to soften the meat.
Once it’s cooked, allow it to cool for a while before slicing. This is because the top layer of fat will still be melty, and while that’s delicious, it makes for extremely messy cutting.

I typically don’t use it all at once, and will keep some sliced in the fridge for breakfast in the morning. I’ll fry it up on the sides and brown it before serving, sometimes just by itself as a sort of super thick bacon, or otherwise in soups or as a main dish if I’m having it for lunch or dinner.

Homestyle Tomato Sauce

This is one of those “old world” recipes you’ll find on this blog. I love to cook what I call “low and slow” which allows flavors to mellow and come together to create something wonderful and delicious. The ingredients are simple; the history is long and profound. Most red sauces you’ll see have most of the same ingredients: tomatoes, salt, pepper. A good marinara focuses on just the tomatoes, while this recipe is for a homestyle pasta sauce where the flavors are rich and hearty, the kind that can warm your soul and make you miss home. 

One of the major reasons why this sauce takes so long is because we are cooking down raw tomatoes, and like anyone who has ever had heartburn can tell you, tomatoes are very acidic. Longer cooking times allow that acid to burn off and make it easier to digest, which is why I recommend that even when you use jar sauce to simmer it on low for about an hour before serving. 

In this recipe you’ll also find other tips on cooking and a couple of secrets of a good pasta sauce. You can also find these tips in my “101” style posts, where I will go over some cooking basics as well as kitchen know-how. 


What You’ll Need:

5lbs Roma Tomatoes (fills up about 5qts before cooking)
Salt
Pepper
Parsley
Basil
Oregano
Crushed Red Pepper
Bay leaves
Whole white (or sweet) onion
Fresh garlic (whole or minced in jar)
Red wine (optional) or balsamic vinegar (optional)
Tomato paste (optional)
Large pot or crock pot
Pan for sauteing
Butter
Low heat cooking oil

Before we start:
This recipe traditionally takes 8-12 hours to cook. Under higher heat settings and a more watchful eye you can have this done in 2-3 hours. A good tip is that as this cooks “low and slow” the flavors will develop further for a more “old world” style of sauce.


Tip: I do not typically put amounts of seasonings on a recipe, because I am a firm believer in tasting as you cook so that you can get an idea for what your palate likes. Read on to get ideas on proportions as I typically make it.

Dice up tomatoes into 1/2″ cubes and put into your crock pot or large pot on low and add gratuitous amounts of salt to help reduce the tomatoes.

Finely dice onion and add to hot pan with oil over medium heat. Add gratuitous amount of salt onto diced onion to let the natural sweetness of the onion emerge. You’re going to cook down the onions on a medium-low heat until browned, stirring occasionally. Add slivers of butter as your pan becomes dry. As the onions become clear and start to brown, add in garlic.

For better directions on caramelizing onions, click here .

Freshly diced tomatoes in my crock pot.

Tip: Heat up your pan slowly, and add olive oil to your pan. If you want to know if it’s hot, add a couple drops of water into the pan and listen for the sizzle. If no sizzle, your pan isn’t hot enough. If it “pops” the water and splashes, your pan is too hot.

Tip: When using fresh cloves of garlic, take the heel of your palm (or the flat side of your knife) and press down onto the clove to open it. This will allow the release of the aromas and flavors within.

Once your onions and garlic is browned, soft, and sweet, add them into the pot with the tomatoes. You’ll notice as time goes on, the tomatoes cook down into a sauce, this is the bulk of your cooking process. I typically have mine in the slow cooker and leave for the afternoon at this point. As your sauce cooks down and begins to generate liquid, you can add your spices. Bay leaves add depth to a sauce and give it that “homemade” taste. Traditional sweet basil will “sweeten” the sauce. Oregano will add an herby note to it, so I don’t use a lot in my own cooking. Parsley adds a “fresh” note and helps counteract garlic breath. Crushed red pepper will help bring some spice and another layer of flavor to help you taste the other ingredients in your sauce.
My typical ratios:
1tbsp oregano, crushed red pepper, black pepper
2tbsp basil
3tbsp parsley
3 bay leaves
And I add salt “to taste”, which means I sprinkle some and wait for it to dissolve and try and keep going until my taste buds become more receptive to the flavor of the dish.

I’m not going to say “no” to adding onion powder, garlic powder, or thyme as you see fit. Feel free to experiment and adjust to see how you like it.

Sauce after blending a little bit. I like mine chunky.

Now I like my sauce chunky so I just blend a little bit of it, but if you like yours smoother, I suggest getting a blender and pureeing the sauce together, minus the bay leaves.

Tip: If you feel like you’re lacking that “tomato” flavor or darkness, add a small can of tomato paste and let it cook through for minimum 1 hour. This allows the acidity of the tomatoes to reduce and allows for a deeper and richer flavor.
Pro tip: Still want a darker looking sauce? Reduce half a cup of red wine and add to the sauce. If you don’t have any in the house, a couple of ounces of a reduced basic balsamic vinegar will do the trick as well. Sorry, Nana. The people deserve to know.

“Steakhouse Style” Asiago Creamed Spinach

I apologize for the terrible photo. I’ll update this one next time I make it.

Classic. Creamy. Delicious. I made this for my company potluck this season for the first time and got a kudos from the company for it, so now I get to share how it was made. I cook a lot by taste testing, so my measurements for this recipe are not precise, but more guidelines. I actually guesstimated on the dry ingredients, but the wet ones were fairly to the point as I could just see how much I used.

I got inspiration to make this because I had gone to Dickey’s BBQ that weekend before and ordered their creamed spinach, which was somewhat similar to what I did here. I used more salt than what they do, and presumably added more cheese for flavor, as this was one of those dishes where I just kept adding until I got to a point where it tasted quite good. 

I had made this in a crock pot, so the directions are fairly straightforward: add things to pot until it is warm and gooey and yummy and let it cook by itself. 


What You’ll Need:

5lbs frozen cut baby spinach
1qt Heavy Whipping Cream
8oz Cream Cheese
1.5 sticks of unsalted butter
5oz shredded asiago cheese
4oz grated parmesan cheese
1/2 tsp ground nutmeg
1tbsp garlic powder
1tbsp onion powder
1tsp paprika
3tbsp sea salt
1tbsp cracked black pepper

If you want to make a smaller portion because you’re not doing a potluck, divide the spinach, cheese, and cream by half.

Add spinach to pot with cream cheese, and let it start to melt down. Slowly mix in heavy cream (ounce or two at a time) when spinach becomes warm until smooth consistency. Add asiago and parmesan cheese until flavor is desired, as well as spices. Do not skip the nutmeg or the salt! The salt brings out all of the flavor and the nutmeg adds a deep richness.

Tip for deeper flavor: Finely dice one sweet onion and caramelize over low to medium heat in a saucepan before adding instead of using all of that onion powder. Best way to caramelize is to start off with some oil in the pan, a good olive oil will do, and then add the onions once the pan is hot and then as I say, “salt like the ocean”. The salt brings out the natural sweetness and flavor of the onion as it cooks down. Cook the onions until browned, as this will take a while. Add a little sliver of butter as needed to keep the pan moist. As the onions clear, take some fresh garlic (minced or whole cloves**) and add it to the pan and just slowly let these flavors come out and smell wonderful.
** When dealing with fresh cloves of garlic, always take the flat side of the knife (or the hell of the palm of your hand) and press down and crack open the garlic to release the aroma and flavor inside.

Cooking with Oil 101

Image result for cooking oil
(C) Foodal

If you’ve ever walked into the spice section of your local grocer, you’ve seen a bunch of different options for oil to cook with. But which is best?

Well, none. They all have different purposes and reasons why we use them. But I’ll break down a couple of key factors when selecting which oil to use to cook with. I’m going to break down some things to think about as well as common cooking oils.

First thing: cooking temperature. Are you frying? Sauteing? Flavoring? All of these impact on which type of oil you use. Oils have different burn temperatures. If you’ve ever put a low heat oil like olive oil on a hot pan and cooked on high and noticed that it started to smoke, then you’ve seen what I mean by burn temperature. Different oils have different burn temperatures, and once it’s burnt, kinda like toast, it loses some of its flavor and it’s no longer good to cook with. I mean, unless you like blackened toast. Then by all means, do what you do.
Second thing: Flavor! Oils might imbue a flavor into your cooking. Is there a certain palette you’re going for? Seasoned oils, or oil that has a flavor added, might be beneficial for what you’re looking for. Fat is the basis for flavor in your cooking, so choosing a good oil can add a lot to a dish.

Vegetable oil: You know it because it’s cheap and typically good for frying. Does this mean it’s bad? No, it’s usually made up of a couple of different oils which make it so that you don’t have a whole lot of flavor in it. This name goes hand-in-hand with canola oil usually. It’s got a high burn temperature of upwards of 450F, which also makes it great for use on the grill and non-stick surfaces.

Olive oil: Usually right next to the vegetable in a bunch of different bottles and codes like “virgin”, “extra virgin”, “cold-pressed” and different colors of bottles. Sometimes you might even see grades.
Olive oil is made by taking fresh olives from the trees and crushing them, as they release the juices it can heat up and become oil. “Virgin” just means it was never treated with anything and the olives are fairly young. “Extra virgin” means the olives were picked as soon as they were grown. “Cold-pressed” means it wasn’t heat treated, which means you might see some settling at the bottom of your container and it’ll need to be shaken every so often. I prefer cold-pressed because it has a lot of the raw flavor of the olives. The dark container is because olive oil needs to be stored in a cool, dry place to maintain peak freshness. Olive oil burns between 325-350F, so it’s used for adding flavor to dishes or dressings and for low-heat cooking.

Side note: When buying flavored oils, olive oil is typically used as the base and then various notes such as garlic, herbs, or peppers are added.

Corn oil: Pretty similar to vegetable oil spec and usage-wise. Some people have reactions to canola oil and use this as a substitute. Burn temp is still around 450F.

Avocado oil: My personal favorite for high-temp cooking. Burns between 400-450F, with higher qualities seen up to 500F. Doesn’t have an avocado flavor if that’s what you’re worried about; but it can have some omega-3’s in the higher quality types so it’s also great when used in dressings.

Coconut oil: This has very similar cooking temperatures to olive oil, this is just for taking very low heat cooking, like vegetables, and because you want to add MCTs (medium-chain triglycerides, something that can help lower your triglyceride and LDL levels) into your diet. This is solid at most room temperatures but then turns liquid when it gets warmer or if kept near your stove, so be very careful about opening the jar.

Look forward to more tips and knowledge on how to use oil and fats in your cooking in 102!

Design a site like this with WordPress.com
Get started